

 soofha
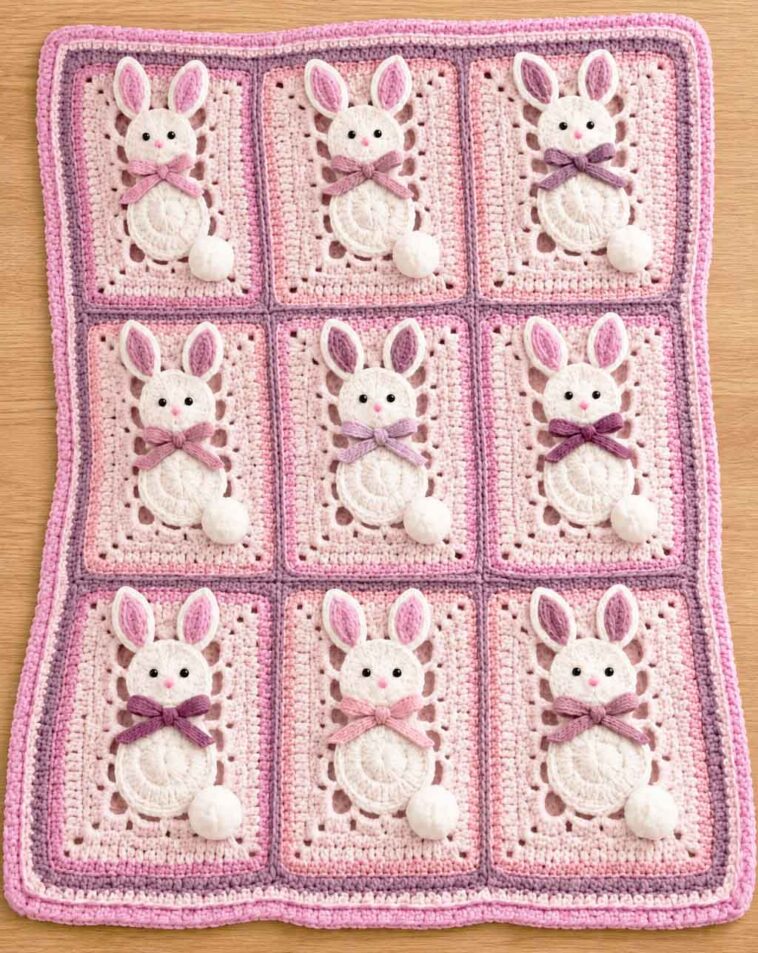
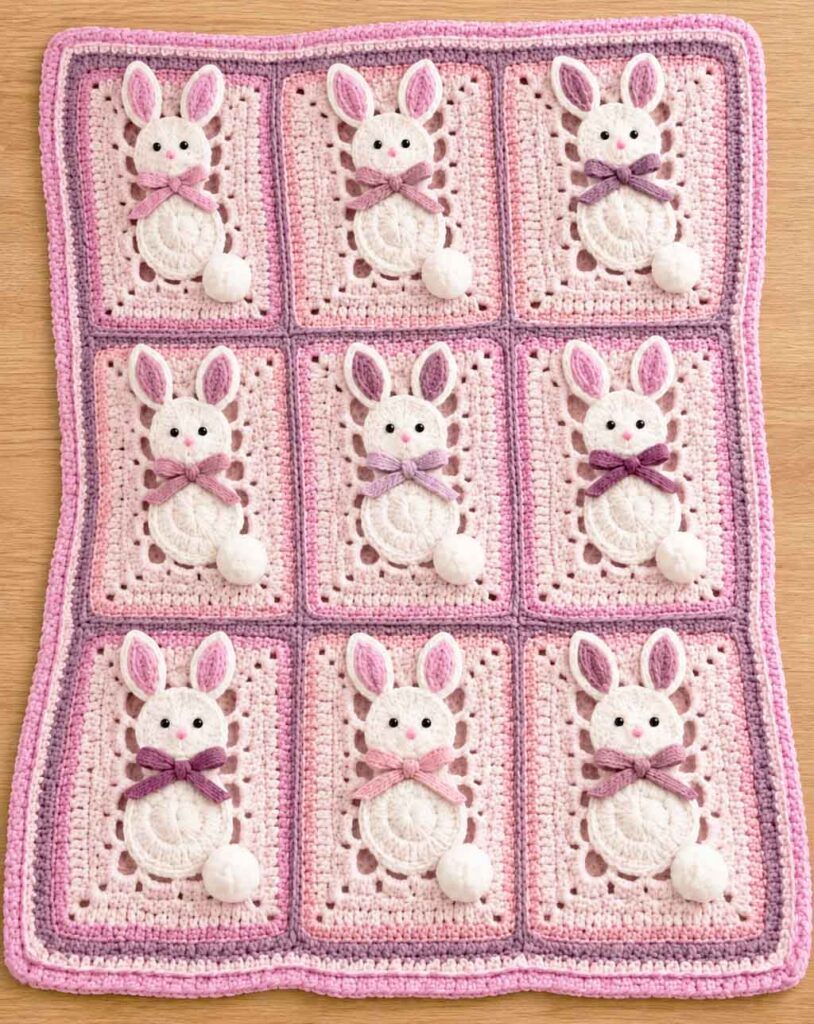
There’s something special about a handmade baby blanket, especially when it’s decorated with little bunnies. The Baby Bunny Blanket Pattern is a lovely project for anyone who enjoys making thoughtful gifts with a personal touch. Each bunny has its own sweet little face, long ears, and fluffy pom-pom tail, creating a design that’s both playful and cozy.
This blanket is made by crocheting individual bunny motifs and joining them together in a four-by-four arrangement. The combination of white bunnies, pink details, and soft pastel colors gives the finished blanket a gentle look that works beautifully in a baby’s nursery.
If you’re planning a baby shower gift, preparing something special for Easter, or making a keepsake for a new arrival, this pattern is worth adding to your crochet list. You can follow the original color scheme or choose shades that match the baby’s room. Soft blue, lavender, mint green, cream, and pale yellow would all look lovely.
The little details are what make this blanket stand out. Embroidered eyes and noses give each bunny its expression, while the pink inner ears and fluffy tails add extra character. A decorative border around each motif brings the squares together, giving the blanket a finished, coordinated appearance.
Although there are several small pieces to make, you can work on the bunny motifs one at a time and assemble the blanket once they’re ready. It’s a satisfying project for crocheters who enjoy combining simple shapes with decorative details. Beginners may also enjoy it if they’re comfortable with basic crochet stitches and sewing pieces together.
Why You’ll Love This Baby Bunny Blanket
This bunny blanket is more than just something warm to wrap around a little one. It’s a handmade project that can be customized to suit different tastes and occasions.
- Adorable bunny motifs: Each square features a little bunny with embroidered facial details and a fluffy tail.
- Beautiful pastel colors: Pink and variegated yarn create a soft, cheerful look, but you can choose your own combination.
- A thoughtful handmade gift: It makes a memorable present for baby showers, birthdays, and Easter celebrations.
- Lovely nursery décor: When not in use, the blanket can add a charming touch to a nursery chair or other decorative space.
- Room for creativity: Experiment with different yarn colors, ribbon bows, and facial details to make your blanket unique.
Materials You’ll Need
Gather your supplies before you begin so you can work through the individual motifs without interruption.
Yarn and Notions
- Worsted-weight yarn:
- 8 oz white yarn
- 8 oz pink yarn
- 4 oz variegated pastel yarn
- White sewing thread
- Sewing needle
- Tapestry needle
- White pom-poms, approximately ¾ inch
- Embroidery yarn or thread for the eyes and nose
Crochet Hooks
- Size E crochet hook for the bunny motifs
- Size F crochet hook for the decorative borders
A helpful tip: Check your yarn labels before starting, as different worsted-weight yarns can produce slightly different results. If you’re making the blanket as a gift, choose a soft yarn suitable for the intended use and follow its care instructions.
Baby Bunny Blanket Pattern Instructions
The blanket is made from 16 bunny motifs arranged in four rows of four. Each motif consists of a circular body, a head, two ears, embroidered facial features, a pom-pom tail, and a decorative border.
The instructions below follow the supplied pattern. Because the original border directions do not specify every stitch placement, check the finished motif measurements and stitch counts as you work.
Part 1: Crochet the Bunny Body
Make 16 bodies using white yarn and the E hook.
Round 1: Chain 4 and join with a slip stitch to form a ring. Chain 3; this counts as the first double crochet. Work 14 double crochet stitches into the ring. Join with a slip stitch to the top of the beginning chain 3.
You should have 15 double crochet stitches, including the beginning chain.
Round 2: Chain 3, then work 1 double crochet into the same stitch. Work 2 double crochet stitches into each stitch around. Join with a slip stitch.
You should have 30 stitches.
Round 3: Chain 1 and work 1 single crochet into the first stitch. Work 2 single crochet stitches into the next stitch.
Continue repeating 1 single crochet in the next stitch, 2 single crochet in the following stitch around the circle. Join with a slip stitch to the first single crochet and fasten off.
You should have 45 single crochet stitches.
Make 15 more body pieces in the same way.
Part 2: Crochet the Bunny Heads
Make 16 heads using white yarn.
For each head, repeat Rounds 1 and 2 of the body instructions.
Once the head is complete, position it against the body. Using a tapestry needle and white yarn, sew 7 stitches along the edge of the head to 7 stitches along the edge of the body.
The finished bunny should measure approximately 4½ inches long.
Before sewing all the pieces together, arrange one head and body to check that you like the proportions. Small adjustments to the placement can change the expression and overall appearance of the bunny.
Part 3: Make the Bunny Ears
Each bunny needs two ears, so you’ll need 32 white ear pieces and 32 pink inner-ear pieces.
White Outer Ears
Using white yarn and the E hook, chain 10.
- Work 1 single crochet into the second chain from the hook.
- Work 1 half double crochet into each of the next 2 chains.
- Work 1 double crochet into each of the next 3 chains.
- Work 1 half double crochet into each of the next 2 chains.
- Work 3 single crochet stitches into the last chain.
Continue along the opposite side of the starting chain:
- Work 1 half double crochet into each of the next 2 chain spaces.
- Work 1 double crochet into each of the next 3 chain spaces.
- Work 1 half double crochet into each of the next 2 chain spaces.
- Work 1 single crochet into the remaining chain space.
Join with a slip stitch to the first single crochet and fasten off.
Repeat until you have 32 white outer ears.
Pink Inner Ears
Using pink yarn and the E hook, chain 7.
- Work 1 single crochet into the second chain from the hook.
- Work 1 single crochet into the next chain.
- Work 1 half double crochet into each of the next 2 chains.
- Work 1 single crochet into the next chain.
- Work 2 single crochet stitches into the last chain.
Continue along the opposite side of the starting chain, following the original sequence:
- Work 1 single crochet into the next chain space.
- Work 1 half double crochet into each of the next 2 chain spaces.
- Work 1 single crochet into each of the final 2 chain spaces.
Join and fasten off.
Assembly: Place one pink inner ear over each white outer ear, centering it carefully. Use white sewing thread or white yarn to tack the pink piece in place with small, discreet stitches.
Sew two ears to the top of each bunny’s head, leaving approximately five stitches between them.
Part 4: Embroider the Face and Attach the Tail
The facial details give each bunny its personality, so take your time with this step.
Using your chosen eye color, embroider two French knots for the eyes. Add a small nose with darker pink yarn.
Try to keep the eyes and nose in similar positions on all 16 bunnies. This helps the finished blanket look coordinated, even though each little face will have its own charm.
Attach one white pom-pom, approximately ¾ inch wide, to the back of each bunny’s body.
Make sure the pom-pom is securely attached and that no loose threads remain.
Part 5: Add the Decorative Border Around Each Bunny
Use the F hook and variegated pastel yarn for the first two rounds.
Round 1
Join the yarn with a single crochet at the center bottom of the bunny’s body.
Chain 4, skip the next 3 stitches, and work a single crochet into the following stitch.
Chain 7, skip the next 3 stitches, and work a single crochet into the following stitch. This forms a corner loop.
Continue around the motif, following the supplied pattern’s arrangement of chain spaces and corner loops. Join with a slip stitch.
Pattern note: The original instructions do not give the complete stitch-by-stitch placement for this round. Follow the original chart or PDF, if available, to reproduce the border accurately.
Round 2
Slip stitch into the first chain-4 loop.
Chain 3 and work 3 double crochet stitches into the same loop.
In each corner chain-7 loop, work:
- 4 double crochet stitches
- Chain 2
- 4 double crochet stitches
Continue around the motif and join with a slip stitch. Fasten off.
Round 3
Join pink yarn with a slip stitch in any double crochet stitch.
Chain 3 and work double crochet stitches around.
At each corner, work 1 double crochet, chain 2, and 1 double crochet.
Round 4
Repeat Round 3 with pink yarn, maintaining the corner increases. Fasten off.
Round 5
Join white yarn and repeat Round 3.
Round 6
Join pink yarn and work single crochet stitches around the motif. Work 3 single crochet stitches into each corner loop.
Fasten off and weave in the ends.
Repeat the border for all 16 bunny motifs.
Part 6: Join the Bunny Motifs
Arrange the completed motifs in four rows of four, checking the direction of the ears and the placement of the bunnies before joining them.
Using pink yarn, sew the motifs together through the back loops only.
Work carefully along each seam to keep the joins neat and consistent. Lay the blanket flat from time to time to make sure the squares are lining up evenly.
If desired, tack the bunny ears to the border of each motif with a few small stitches. This helps keep them in position and adds a little extra security.
Part 7: Crochet the Outer Blanket Border
Once all 16 motifs are joined, it’s time to finish the outside edge.
Round 1
Start at any double crochet stitch along the outer border.
Chain 3, counting this as the first double crochet. Work double crochet stitches around the blanket, including 2 double crochet stitches in the chain spaces between motifs and 3 double crochet stitches in each corner.
Join with a slip stitch.
Check the edge as you work. If the border begins to ruffle or pull inward, the stitch placement or tension may need adjusting.
Round 2
Chain 3 and work double crochet stitches in the back loops only around the blanket.
At each corner, work a double crochet into the first stitch, skip the second stitch, and work a double crochet into the third stitch.
Continue around, join with a slip stitch, and fasten off.
Fold this row toward the back of the blanket and sew it down to create the doubled border edge described in the original pattern.
Final Decorative Round
Join the variegated pastel yarn between any two double crochet stitches.
Repeat the following sequence around the edge:
- Chain 3.
- Skip 3 stitches.
- Work a single crochet between the next two double crochet stitches.
Continue around the blanket and join with a slip stitch.
Fasten off and weave in all remaining ends.
Tips for Making Your Baby Bunny Blanket
A few simple habits can make this project easier to manage, especially when you’re working with many small pieces.
Finish the motifs in batches. Crochet several bodies, then the heads, and then the ears. Working in batches can be more convenient than completing every bunny individually.
Keep your colors consistent. If you want all the bunnies to look similar, use the same yarn shades and embroidery colors throughout.
Check the seams before finishing. Arrange the motifs on a flat surface and make sure the rows are straight before sewing them together.
Secure every decorative piece. Pay particular attention to the ears, embroidered features, and pom-pom tails. If the blanket is intended for a baby, avoid loose or detachable decorations and follow applicable safe-sleep guidance.
Choose yarn with care. A soft, washable yarn can be especially practical for a blanket that may need frequent cleaning. Always follow the manufacturer’s washing instructions.
Ways to Customize Your Bunny Blanket
One of the nicest things about a motif-based blanket is how easily you can change its appearance.
- Soft spring pastels: Combine pink, mint, lavender, pale yellow, and baby blue.
- A neutral nursery look: Use ivory, beige, taupe, and cream for a gentle, understated finish.
- A blue bunny blanket: Replace the pink details with light blue or dusty blue.
- A rainbow-inspired blanket: Give each motif a different pastel border while keeping the bunnies white.
- A personalized handmade gift: Match the colors to the baby’s nursery or use a favorite color combination.
You can also experiment with different ribbon colors if you add bows as an optional embellishment.
Frequently Asked Questions
Is the Baby Bunny Blanket suitable for beginners?
It can be a good project for crocheters who already know basic stitches such as chain, single crochet, half double crochet, double crochet, and slip stitch. Beginners should also be comfortable sewing crocheted pieces together and embroidering small details.
How many bunny motifs are needed?
The pattern uses 16 motifs arranged in four rows of four.
Can I change the yarn colors?
Yes. White bunnies with pink details create a classic look, but blue, lavender, mint, cream, and other pastel shades work well too. Keep in mind that changing yarn weight or hook size may affect the finished dimensions.
Is this blanket a good baby shower gift?
Absolutely. The bunny design makes it a lovely handmade gift for a baby shower, Easter, or a baby’s first room. Make sure all decorative pieces are securely attached and appropriate for the intended use.
Where can I find the Baby Bunny Blanket PDF pattern?
If you have the original PDF, add your verified download link at the end of this article. Readers can then open the instructions, save a copy, and refer to the pattern while crocheting.
Get the Baby Bunny Blanket PDF Pattern
Ready to make a blanket filled with adorable little bunnies? Gather your yarn and hooks, choose your favorite pastel colors, and work through the motifs one at a time.
The finished blanket combines sweet bunny faces, soft ears, fluffy tails, and a decorative border in a design that feels right at home in a nursery. Whether you’re making it for your own family or creating a gift for someone special, the time spent on each little detail makes it a meaningful handmade project.
Download the Baby Bunny Blanket PDF Pattern: Add the original, verified PDF download link here so readers can access the complete pattern.
Happy crocheting! 🐰🧶

