 soofha
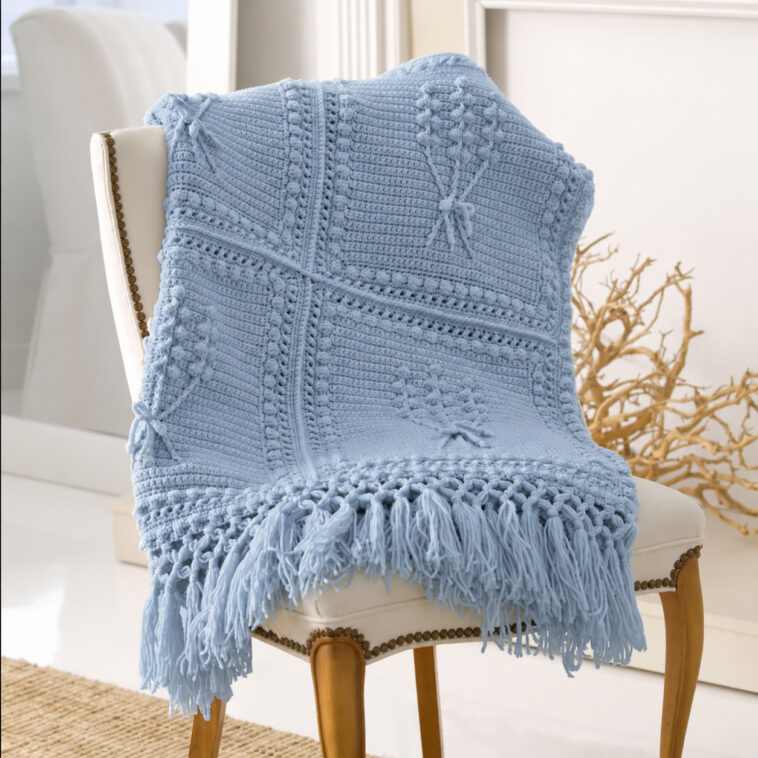
If you love crochet blankets with beautiful texture and a classic look, the Aran Nosegay Crochet Throw is a pattern worth adding to your collection. It combines traditional Aran-inspired stitches with little bobble details to create a blanket that feels cozy, elegant, and full of character.
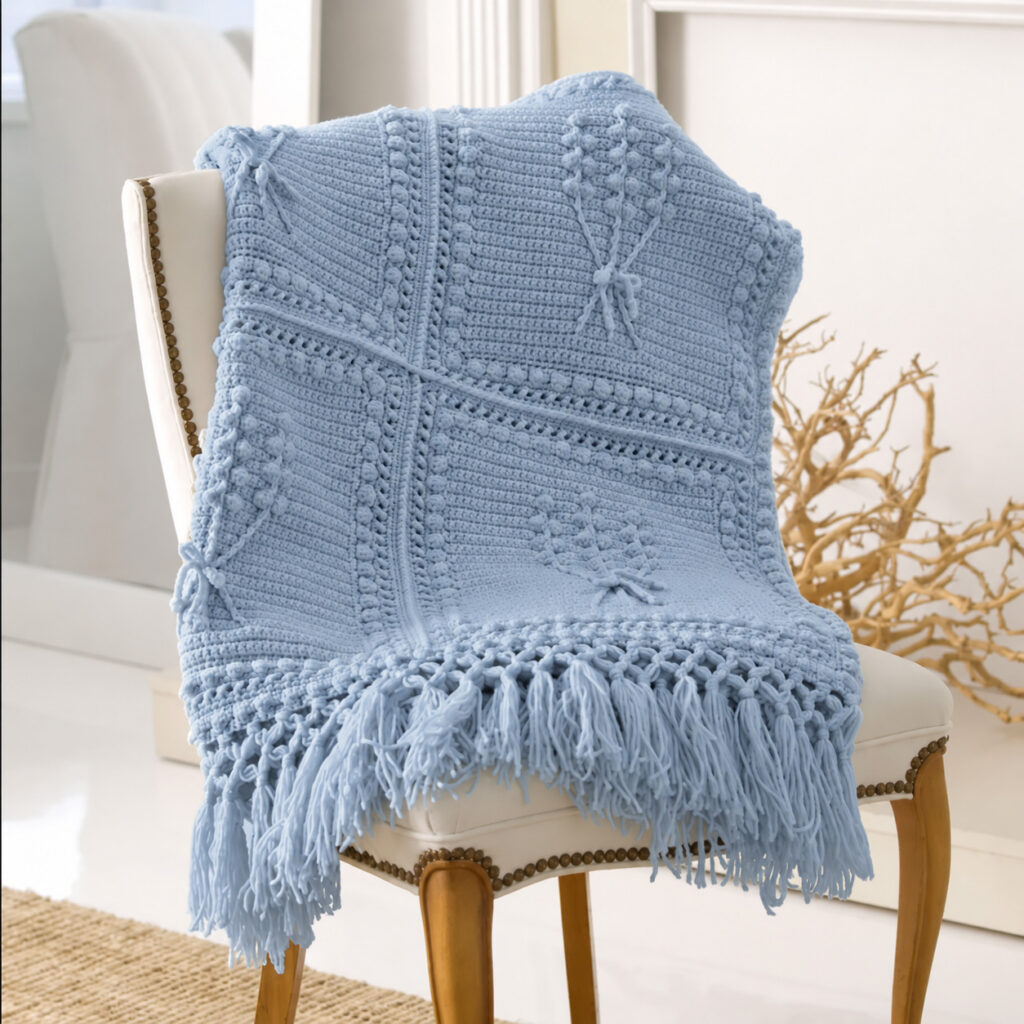
What makes this throw stand out is the lovely mix of raised stitches and decorative floral-like details. The textured motifs give the blanket plenty of depth, while the small bobbles add a charming touch. Once all the pieces are joined together, they create a beautiful design that looks just as lovely draped over a sofa as it does spread across a bed.
This is a great project for crocheters who are comfortable with basic stitches and want to try something a little more detailed. You’ll get to practice front post double crochet, bobble stitches, and joining individual motifs to create one gorgeous finished piece.
The completed blanket measures approximately 48 x 67 inches, making it a generous size for curling up with on a chilly evening or adding a handmade touch to your home.
Materials You’ll Need
Before getting started, gather the following supplies:
- 8 skeins of Red Heart Super Saver yarn in Aran
- 5.5 mm crochet hook (US I-9)
- Yarn needle for weaving in the ends
- Scissors
The traditional Aran shade gives this blanket a timeless, cozy appearance. However, you can choose a different color to match your home decor or give the finished throw a more modern feel.
Crochet Gauge
Checking your gauge before starting can help you achieve the correct finished size.
- 14 single crochet stitches = 4 inches
- 16 rows = 4 inches
- Approximate motif size: 14½ inches wide x 15 inches high
Keep in mind that everyone crochets a little differently. If your gauge is noticeably different, try adjusting your hook size before making all the motifs.
Skill Level
Intermediate
This pattern is best suited to crocheters who already know the basic stitches and feel comfortable following a more detailed design.
You’ll be working with several techniques, including:
- Single crochet
- Front post double crochet (FPdc)
- Bobble stitches
- Motif joining
- Decorative border rounds
The combination of these stitches is what gives the Aran Nosegay Crochet Throw its distinctive texture. If you haven’t worked with bobbles or front post stitches before, it may help to practice them on a small swatch first.
How the Aran Nosegay Crochet Throw Is Made
The blanket is made from 12 individual motifs, which are crocheted separately and then joined together. Each motif features raised stitch patterns and decorative bobbles that create the blanket’s signature look.
Working the blanket in smaller sections makes the project easier to manage. You can complete one motif at a time before bringing everything together during assembly.
Step 1: Crochet the Motifs
Make 12 motifs using the pattern instructions.
Begin with a foundation chain, then work rows of single crochet to establish the base of the motif.
Row 1 (right side): Single crochet in the second chain from the hook and in each remaining chain across, making 39 single crochet stitches.
Rows 2–6: Chain 1, then single crochet in each stitch across.
As you continue, the pattern introduces front post double crochet stitches worked around stitches from earlier rows. These raised stitches form the decorative stems and textured lines that give the design its Aran-inspired appearance.
Bobble stitches are also incorporated into the motif to create small, raised accents resembling floral clusters. Take your time with these sections, as keeping your stitches consistent will help the finished motifs look neat and even.
Note: These rows are an overview of the construction, not a complete substitute for the original pattern instructions.
Step 2: Add the Motif Border
Once a motif is complete, work the decorative border around its edges.
The border combines single crochet edging, bobble details, and a decorative double crochet lattice round. Together, these elements give each motif a more finished appearance while helping define its shape.
Try to keep your border tension consistent across all 12 motifs. This will make a difference when you join the pieces and help the blanket lie flat.
Repeat the process until all 12 motifs are finished.
Step 3: Join the Motifs
Now comes the fun part: bringing all your individual pieces together!
Arrange the motifs in three rows of four, checking that the textured patterns face the right direction and the edges line up neatly.
With the wrong sides facing each other, hold two motifs together and join them using single crochet through the back loops, following the original pattern’s joining instructions.
Continue joining the motifs until all 12 pieces form one blanket.
Take a moment to check your seams as you work. Even joins will give the finished throw a tidy appearance and help the overall design look balanced.
Step 4: Crochet the Final Border
With the motifs joined, it’s time to finish the outer edge of the blanket.
Work the final border around the entire throw, repeating the decorative elements specified in the original pattern. These include single crochet rounds, bobble stitches, and additional edging details.
The border brings everything together and gives the blanket a more polished look. It also highlights the textured motifs without taking attention away from their beautiful stitch patterns.
Step 5: Add Fringe and Decorative Bows
The finishing details are what make this throw especially charming.
Adding the fringe
Cut strands of yarn approximately 20 inches long. Attach groups of strands along the ends of the blanket, spacing them evenly. Once all the fringe is in place, trim the ends carefully to create a neat, consistent finish.
Making the decorative bows
Small chain ties are threaded through the motifs and arranged into bows. These delicate details add a sweet, decorative touch that complements the raised stitches and floral-inspired bobbles.
Arrange the bows evenly and adjust them until you’re happy with the overall look.
Download the Free Aran Nosegay Crochet Throw Pattern PDF
Ready to make your own Aran Nosegay Crochet Throw?
The original pattern includes the complete step-by-step instructions, stitch details, and layout diagrams needed to work through the project.
Download the Free PDF Pattern using the original pattern link provided on your website.
Be sure to follow the complete instructions for the motif rows, decorative borders, joining method, and finishing details to achieve the intended design.
Final Thoughts
The Aran Nosegay Crochet Throw is a lovely choice for anyone who enjoys blankets with plenty of texture and traditional charm. From the raised Aran-inspired stitches to the little bobbles and decorative bows, every detail gives this blanket its own special character.
Although it takes a little patience to make all 12 motifs and join them together, the result is well worth the effort. The finished throw is cozy, eye-catching, and beautiful enough to display in your living room while still being practical for everyday use.
Whether you’re making it for your own home or creating a thoughtful handmade gift, this textured crochet blanket is a wonderful way to put your skills to use and create something you’ll enjoy for years to come.

