

 soofha
Hi, friend! Welcome back to Soofha. Grab your favorite yarn, settle in with a cup of coffee, and get ready to try a crochet technique that looks wonderfully intricate but is actually much easier than it appears.
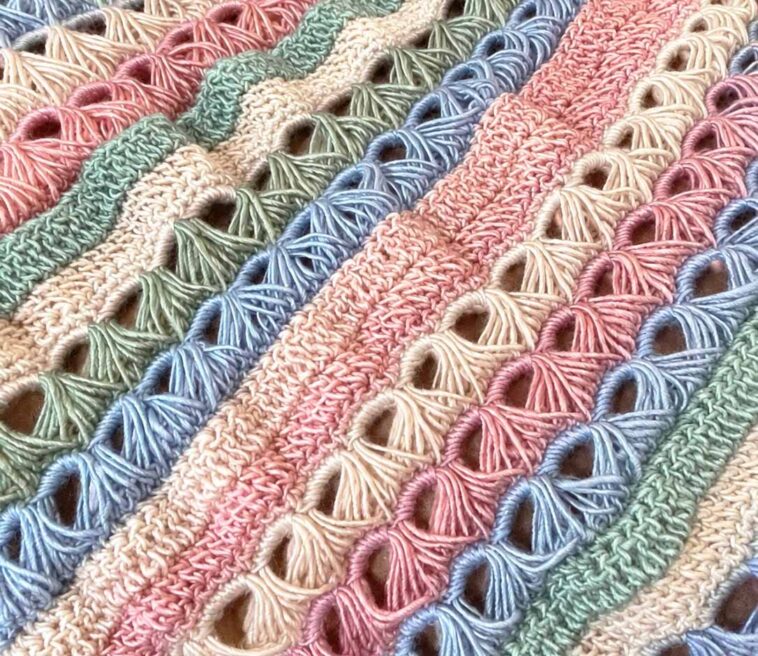
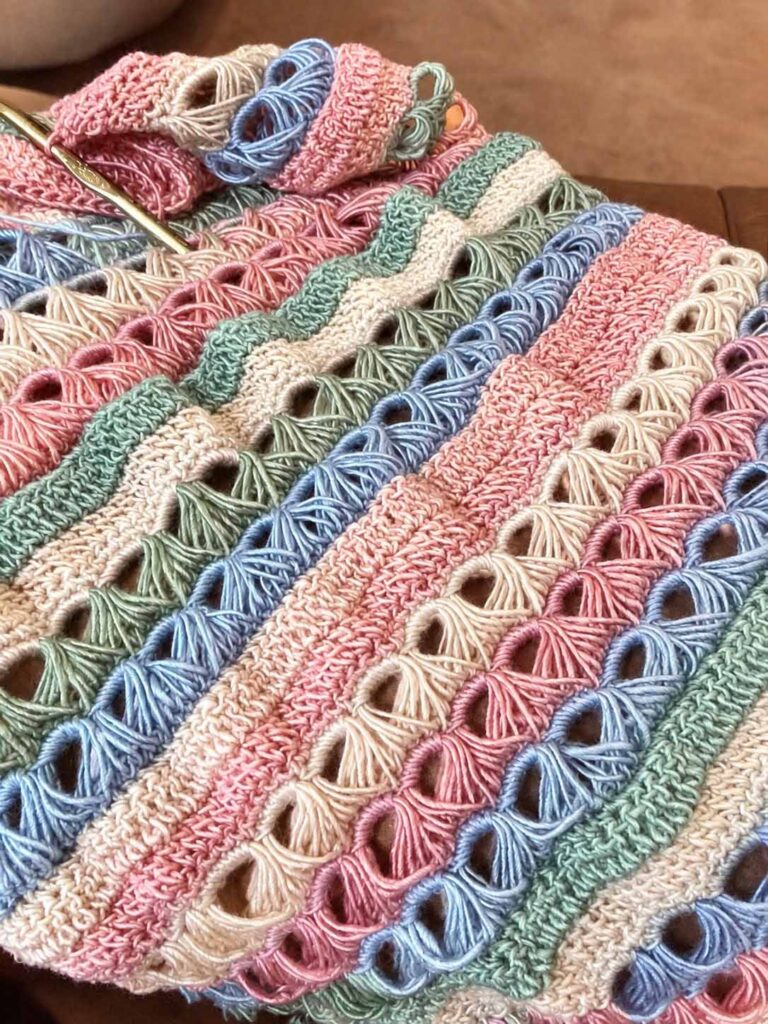
Today, we’re making a Broomstick Lace Infinity Scarf, a beautiful accessory featuring elongated loops and delicate open spaces. The finished fabric has a graceful, almost vintage-inspired appearance, making this scarf feel extra special while still being an enjoyable project to crochet.
If you’ve never tried broomstick lace before, don’t be intimidated by the name or by the oversized needle used to create it. Once you understand the basic rhythm, the technique becomes surprisingly repetitive and relaxing.
Why You’ll Love This Broomstick Lace Scarf
Some crochet stitches have an unmistakable personality, and broomstick lace is certainly one of them. The combination of long loops and gathered clusters creates an airy fabric with plenty of texture.
The Broomstick Lace Infinity Scarf Pattern is particularly lovely because the openwork gives the scarf a delicate appearance without requiring a complicated collection of crochet stitches.
The secret is in the construction.
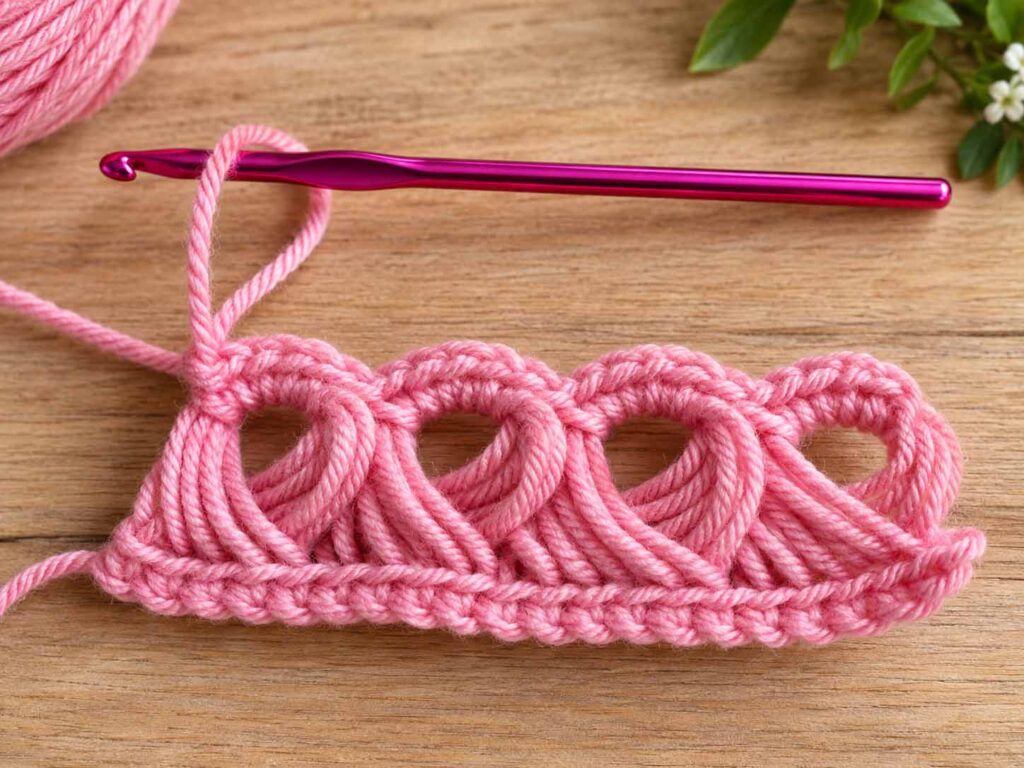
Instead of working directly into every stitch with your crochet hook, you pull up long loops and place them around a large knitting needle, dowel, broomstick lace tool, or another smooth cylindrical object. The loops are then gathered into groups and crocheted together.
This produces the distinctive open “eye” effect associated with broomstick lace.
Once you get into the rhythm, the process becomes simple:
Pull the loops → group them → crochet the groups together → repeat.
That repetitive structure makes this scarf an excellent way to practice broomstick lace while creating something practical and beautiful.
Choosing Yarn for Your Scarf
Broomstick lace looks especially attractive when worked with yarn that has a little drape.
For this project, worsted-weight or #4 yarn works nicely because it provides enough structure to show off the lace while still creating a comfortable scarf.
You can use:
- Soft acrylic
- Wool blends
- Merino blends
- Cotton blends
- Smooth gradient yarn
- Other yarns with good drape
If you are learning the technique for the first time, I recommend avoiding very fuzzy or heavily textured yarn. Smooth yarn makes it much easier to see each elongated loop and understand exactly where your hook needs to go.
A solid color is also a wonderful choice because it lets the unusual stitch structure become the star of the project.
Choosing Your Broomstick Lace Tool
The size of the large needle or dowel makes a noticeable difference in the finished fabric.
A smaller tool creates shorter, more compact loops and produces a slightly denser fabric.
A larger tool creates longer loops and more dramatic open spaces.
For this scarf, a tool approximately 20–25 mm in diameter gives the lace a beautiful open appearance.
You can use:
- A large knitting needle
- A broomstick lace needle
- A smooth wooden dowel
- A specialized broomstick lace tool
- Another smooth cylindrical object of a suitable diameter
Whatever you choose, make sure the surface is smooth enough that your loops can slide off easily.
Broomstick Lace Infinity Scarf Details
The scarf is first crocheted as a long rectangle. Once the desired length has been reached, the two short ends are joined together to create the infinity shape.
Finished Size
Approximately:
7–8 inches wide × 52–56 inches around
Your finished measurements may vary depending on your yarn, hook size, tension, and broomstick tool diameter.
For a looser scarf that wraps more generously around the neck, you can continue crocheting until the rectangle reaches approximately 60 inches long.
Materials
- Worsted-weight / #4 yarn — approximately 300–350 yards
- 6 mm crochet hook
- 19–25 mm knitting needle, dowel, broomstick lace tool, or smooth cylindrical tool
- Yarn needle
- Scissors
- Measuring tape
A tool around 12–25 mm can be used for broomstick lace. The larger the diameter, the larger and more open the resulting lace loops will be.
Abbreviations
- ch – chain
- sc – single crochet
- st / sts – stitch / stitches
- lp / lps – loop / loops
- rep – repeat
- FO – fasten off
Pattern Notes
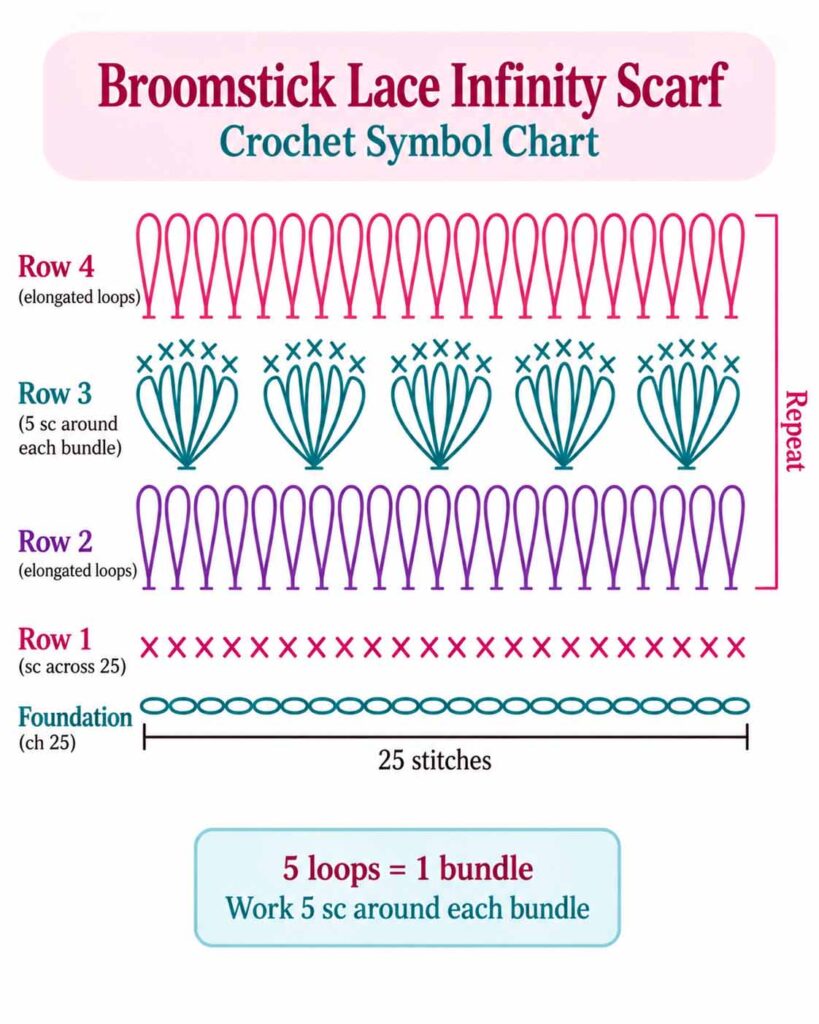
This version of the pattern uses groups of five elongated loops.
That means your working stitch count should remain a multiple of five.
For this scarf:
25 working stitches = 5 broomstick lace groups
Each complete broomstick lace repeat consists of two main stages:
- Loop Row
- Cluster Row
Try not to crochet the single crochets too tightly. Broomstick lace looks best when the fabric remains soft, flexible, and drapey.
Foundation Row
Begin with:
Ch 26
Starting in the second chain from your hook, work:
Sc in each chain across.
You should have:
25 sc
These 25 stitches will create five groups of five elongated loops.
Broomstick Lace Loop Row
Now comes the fun part!
Place your large knitting needle, dowel, or broomstick lace tool horizontally in front of your work.
Starting with the first available stitch:
- Insert your crochet hook into the stitch.
- Yarn over.
- Pull up a long loop.
- Extend the loop until it reaches comfortably around your large needle.
- Place the loop onto the needle.
Repeat the same process in every stitch across the row.
Continue until all 25 stitches have been converted into elongated loops.
You should now have:
25 elongated loops on your large needle
Keeping Your Loops Even
Try to keep every loop approximately the same height.
Each loop should:
- Face the same direction
- Sit at a consistent height
- Remain untwisted
- Fit comfortably around the large tool
The large needle acts almost like a measuring guide, so use it to help keep your loops consistent.
If one loop is noticeably longer or shorter than the others, correct it before continuing.
First Cluster Row
Now we’ll crochet the elongated loops back into the fabric.
For the first group, work with five loops at a time.
Insert your crochet hook through the first five loops.
Carefully slide those five loops off the large needle while keeping them together.
Yarn over and pull through the entire group.
Then:
Ch 1
This chain helps secure the group and does not count as a stitch.
Now work:
5 sc around the center of the five-loop bundle.
The important point here is that you are not working one single crochet into each individual elongated loop.
Instead, all five single crochets are worked around the entire group.
You have now completed your first broomstick lace cluster.
Working the Remaining Clusters
Move to the next five elongated loops.
Insert your hook through all five loops and carefully remove them from the large needle.
Then work:
5 sc around the entire bundle.
Continue across the row.
You should finish with:
5 clusters
and:
25 sc total
Keeping the same number of loops and single crochets is important because it maintains the width of the scarf.
Second Loop Row
Do not fasten off.
The 25 single crochets you just made become the foundation for the next lace row.
Starting with the first single crochet, pull up one long loop and place it around the large needle.
Repeat in every stitch across.
Once again, you should have:
25 elongated loops
Second Cluster Row
Now gather the loops into groups of five.
For the first group:
- Insert your hook through five loops.
- Remove those loops from the large needle.
- Pull the yarn through the group.
- Ch 1.
- Work 5 sc around the bundle.
For every remaining group:
5 loops → 5 sc around the bundle
At the end of the row, you should again have:
25 sc
Continue the Pattern
The entire scarf is built around this simple two-row rhythm.
Loop Row
Pull up 25 elongated loops and place them onto your large needle.
Cluster Row
Separate the loops into five groups of five and work five single crochets around each group.
Then repeat.
Continue until your scarf reaches approximately:
52–56 inches long
or your preferred finished length.
The beauty of broomstick lace is that the technique remains essentially the same throughout the project. Once you learn the motion, you can settle into a comfortable rhythm.
Easy Broomstick Lace Memory Trick
If you’re worried about forgetting the steps, remember:
PULL → GROUP → FIVE
Pull one elongated loop from each stitch.
Group the loops in sets of five.
Work five sc around each group.
Then repeat.
That’s the heart of this entire scarf!
Measuring Your Scarf
Place your work flat without stretching it.
Measure from the foundation edge to the current working edge.
For this design, approximately 52–56 inches gives you a comfortable infinity scarf that can generally be wrapped around the neck twice.
For a more relaxed, oversized style, continue to approximately 60 inches.
Remember that yarn type and tension can affect the final dimensions.
Final Stabilizing Row
It is best to finish the scarf after completing a cluster row so that you have 25 single crochet stitches along the final edge.
Ch 1.
Work:
1 sc in each stitch across.
You should have:
25 sc
Fasten off and leave a long yarn tail, approximately 18–24 inches, for sewing the scarf together.
This additional single crochet row helps stabilize the edge and provides a neat surface for joining the two ends.
Joining the Infinity Scarf
Lay the finished rectangle flat.
Bring the two short ends together.
Before sewing, check carefully that the scarf has not accidentally been twisted.
If you want a traditional infinity scarf, the rectangle should join without a twist.
Align:
25 stitches from the beginning edge
with:
25 stitches from the final edge
Thread your long yarn tail onto a yarn needle.
Whipstitch the two edges together one stitch at a time.
Try not to pull the seam excessively tight. The join should remain flexible and have a similar amount of movement as the rest of the scarf.
Once the seam is secure, fasten off and weave in the remaining end.
Turn the seam toward the inside.
Your infinity scarf is finished!
Optional Neater Seam
If you prefer a seam that blends more subtly into the lace, try mattress stitch.
Work through the outer loops along each edge and gently draw the two sides together.
Instead of tightening the entire seam at once, gradually pull the stitches closed as you work.
This can create a softer, less noticeable join.
How to Make the Scarf Wider or Narrower
The width is easy to customize because the pattern is based on groups of five.
Simply adjust your foundation chain in multiples of five.
Narrower Version
20 working stitches = 4 lace groups
Foundation:
Ch 21
This Version
25 working stitches = 5 lace groups
Foundation:
Ch 26
Wider Version
30 working stitches = 6 lace groups
Foundation:
Ch 31
The basic rule is:
Working stitches + 1 = foundation chain
For example:
20 stitches → Ch 21
25 stitches → Ch 26
30 stitches → Ch 31
Adjusting the Loop Size
Your large tool has a major influence on the finished appearance.
Smaller Tool — Approximately 15–19 mm
You’ll get:
- Smaller openings
- More compact loops
- A slightly denser fabric
- More structure
Larger Tool — Approximately 20–25 mm
You’ll get:
- Longer loops
- Larger lace openings
- A lighter fabric
- A more dramatic openwork effect
For this particular infinity scarf, I love the look created by a 20–25 mm tool.
Choosing Different Yarns
There are plenty of possibilities when it comes to yarn.
Try:
- Soft acrylic for an affordable everyday scarf
- Merino blends for warmth and softness
- Wool blends for a cozy winter accessory
- Cotton blends for a lighter feel
- Smooth gradient yarn for changing colors
- Soft fibers with good drape for an elegant finish
Very fuzzy yarn can make broomstick lace more difficult to learn because the individual loops may be harder to distinguish.
If this is your first broomstick lace project, smooth worsted-weight yarn is an excellent place to start.
Playing With Color
A single color allows the unusual lace texture to take center stage, but color changes can also create beautiful effects.
For stripes, change yarn after completing a cluster row.
This allows the next color to begin neatly before you create the following set of elongated loops.
You could change colors:
- After every lace repeat
- Every two repeats
- Every four repeats
- Every five repeats
Beautiful color choices include:
- Cream
- Dusty rose
- Burgundy
- Forest green
- Sage
- Caramel
- Muted mauve
- Soft beige
A gradient yarn can also be particularly pretty because the color changes naturally move through the elongated lace sections.
Troubleshooting Your Broomstick Lace
My Loops Are Uneven
Try not to estimate the loop height entirely by eye.
Instead, pull each loop until it comfortably fits around the same section of your large needle or dowel.
Your tool acts as a consistent guide and makes it much easier to create evenly sized loops.
My Loops Are Twisting
Stop before beginning the cluster row.
Check the loops sitting on the needle and straighten any that have become twisted.
Ideally, every loop should face the same direction.
My Scarf Is Getting Narrower
Check your stitch count after every cluster row.
For this pattern, you should always have:
25 sc
The most common problem is accidentally working only four single crochets around a five-loop group.
Keep this rule in mind:
5 loops = 5 sc
I Have Too Many Stitches
You may have accidentally worked an extra single crochet into one of your clusters.
Count each group carefully as you work.
Every five-loop bundle receives exactly five single crochets.
The Loops Are Hard to Remove
You don’t need to remove all 25 loops at once.
Work with one group of five loops at a time.
Slide only those five loops off the needle, crochet them together, and then move to the next group.
Keeping the remaining loops safely on the tool can make the process much easier while you are learning.
My Scarf Feels Too Stiff
Broomstick lace should generally have a soft, flexible feel.
If your fabric seems too firm, try:
- Using a larger broomstick tool
- Increasing your crochet hook size slightly
- Relaxing your single crochet tension
- Choosing a softer yarn with better drape
A larger tool can make a surprisingly big difference in the openness of the finished lace.
Optional Short Cowl
You don’t have to make a full-length infinity scarf with this technique.
For a shorter cowl, simply work the rectangle until it measures approximately:
24–28 inches long
Then join the two short edges in the same way.
This creates a shorter accessory that can be worn once around the neck.
Blocking Your Finished Scarf
Once your scarf is complete, gentle blocking can help the lace openings settle into a more even shape.
If your yarn is suitable for wet blocking, lightly dampen the scarf and lay it flat on a clean towel or blocking mat.
Use your fingers to gently arrange the lace openings.
Avoid pulling the fabric aggressively.
You want to encourage the broomstick lace to relax rather than stretch it dramatically.
Allow the scarf to dry completely before wearing or storing it.
Beginner Tips for Better Results
If you are new to broomstick lace, take your time with the first few repeats.
The technique may feel unusual at first because you are working with a second, oversized tool rather than only your crochet hook.
Focus on consistency rather than speed.
Try to make each elongated loop the same height, and count your groups carefully.
After a few repeats, your hands will begin to remember the motion.
And once that happens, broomstick lace becomes wonderfully rhythmic.
Broomstick Lace Infinity Scarf Chart
The construction can be remembered simply as:
25 sc
↓
Pull up 25 elongated loops
↓
Group 5 loops together
↓
5 sc around the bundle
↓
Repeat across
↓
25 sc
↓
Repeat Loop Row + Cluster Row
↓
Finish at desired length
↓
Add final stabilizing sc row
↓
Join short ends
↓
Infinity Scarf Complete!
Final Thoughts
This Broomstick Lace Infinity Scarf Pattern is a wonderful project if you’re ready to step outside traditional crochet and experiment with a different type of texture.
The finished scarf looks sophisticated and intricate, but the actual construction is based on a surprisingly simple repeating sequence.
Once you understand the basic rhythm of pulling up the long loops, grouping them into fives, and crocheting around each bundle, the rest of the project becomes wonderfully repetitive.
It’s also an easy design to personalize. Change the yarn, experiment with the diameter of your broomstick tool, make the scarf narrower or wider, or adjust the length to create a completely different accessory.
Whether you choose a soft neutral, a rich autumn shade, or a colorful gradient, the open lace texture will give the finished scarf plenty of character.
So grab your favorite yarn and give broomstick lace a try!
Pull → Group → Five.
That’s all you need to remember.
Thanks so much for visiting Soofha! I hope this project inspires you to experiment with broomstick lace and discover just how beautiful this unique crochet technique can be. Be sure to explore more of the blog for crochet stitch tutorials, handmade accessories, seasonal projects, and plenty of creative inspiration.

