

 soofha
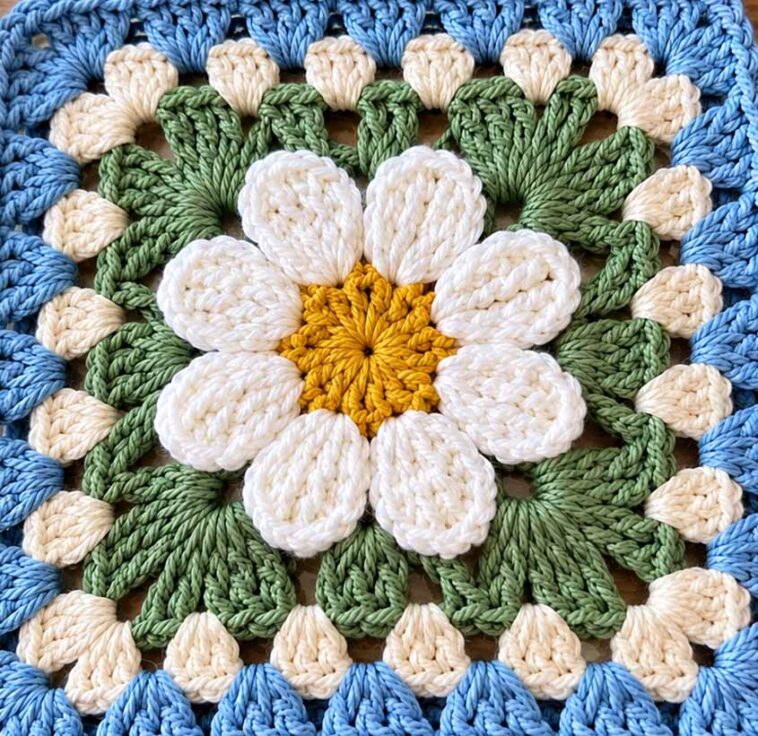
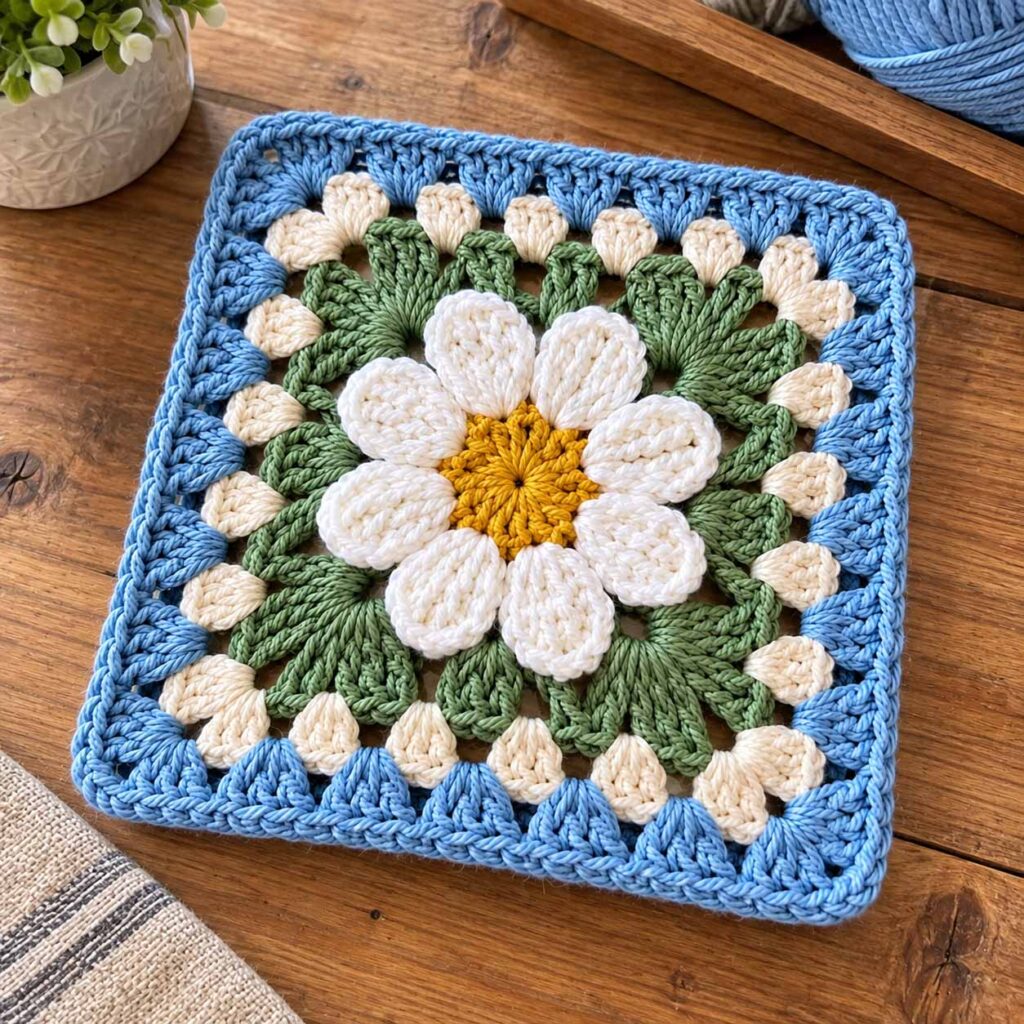
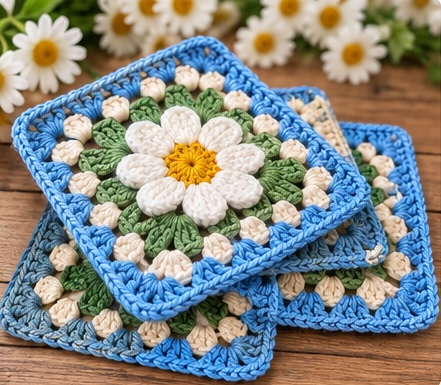
Bring a touch of vintage cottage charm to your crochet projects with this Vintage Raised Daisy Floral Granny Square. This beautiful square combines a dimensional white daisy, leafy green petals, small cream floral accents, and a classic blue granny-square border.
The raised flower gives the design a lovely 3D texture, making it perfect for blankets, cushions, bags, cardigans, table runners, and other floral crochet projects.
🌼 Vintage Raised Daisy Floral Granny Square
Skill Level
Intermediate
The pattern uses basic crochet stitches, but the dimensional flower and layered floral details require careful stitch placement.
Finished Size
Approximately 10–11 inches (25–28 cm) square, depending on yarn weight, hook size, and tension.
You can easily make the square smaller or larger by changing the number of border rounds.
Materials
- Worsted-weight or aran yarn
- Crochet hook suitable for your yarn
- Yarn needle
- Scissors
Suggested Colors
For a vintage-inspired version, use:
- Golden yellow – flower center
- Cream/off-white – main daisy petals
- Sage green – leaves and foliage
- Ivory/cream – small surrounding flowers
- Vintage blue – outer granny-square border
Cotton yarn works particularly well because it gives the flower petals excellent stitch definition.
Crochet Abbreviations
US crochet terminology:
- ch – chain
- sl st – slip stitch
- sc – single crochet
- hdc – half double crochet
- dc – double crochet
- tr – treble crochet
- st/sts – stitch/stitches
- sk – skip
- sp – space
- rep – repeat
- rnd – round
- FO – fasten off
Part 1: The Raised Daisy Center
Start with your golden-yellow yarn.
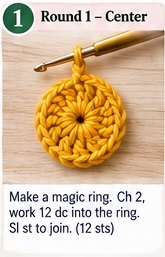
Round 1
Make a magic ring.
- Ch 2.
- Work 12 dc into the ring.
- Sl st to the first dc to join.
You should have 12 stitches.
Pull the magic ring closed securely.
Round 1
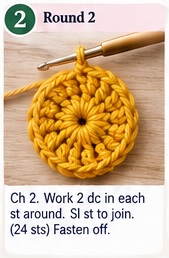
Round 2
Ch 2.
Work 2 dc in each stitch around.
Sl st to join.
You should now have approximately 24 stitches.
Fasten off the yellow yarn.
Part 2: Raised White Daisy Petals
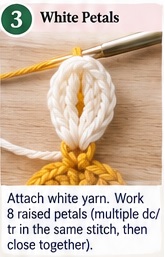
Attach your cream or white yarn between two stitches of the yellow center.
The petals are created by working several taller stitches into the same area and then closing them together, producing the raised, dimensional appearance seen in the photograph.
Petal
For each petal:
- Insert hook into the designated stitch.
- Yarn over and pull up a loop.
- Work several elongated dc/tr stitches into the same area without completely finishing each stitch.
- Once the desired height is reached, yarn over and pull through the accumulated loops.
- Ch 1 to secure the petal.
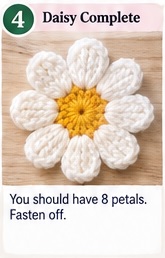
Repeat around the yellow center to create approximately 8 large petals.
Arrange the petals evenly around the center.
Tip for Raised Petals
Don’t pull the stitches too tightly.
The petals should stand slightly above the center rather than lying completely flat. Gently shape each petal with your fingers as you work.
When finished, you should have a flower resembling a vintage daisy with a pronounced dimensional center.
Part 3: Green Leaf Layer
Attach your sage-green yarn behind the white flower.
This layer creates the leafy background surrounding the daisy.
Leaf Cluster
For each leaf:
- Ch 3.
- Work 1 dc.
- Work 2 tr.
- Work 1 dc.
- Ch 2.
- Sl st back into the starting point.
This creates a pointed leaf.
Repeat around the flower, spacing the leaves evenly.
For a fuller floral appearance, make some leaves slightly larger by adding an additional tr.
Continue working around the flower until you have approximately 8–12 leaves.
Fasten off.
Part 4: Cream Floral Accents
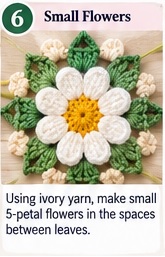
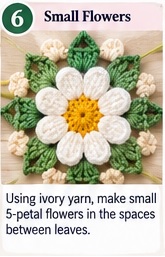
The photograph features small cream-colored raised floral motifs between the green foliage and the blue border.
Attach ivory or cream yarn in the spaces between the leaves.
Small Flower
In one space:
- Sl st into the space.
- Ch 2.
- Work 3 dc into the same space.
- Ch 2.
- Sl st into the same space.
Repeat this 5 times around the center point to create a small five-petal flower.
Fasten off.
Repeat in the surrounding spaces.
Creating the Vintage Look
Don’t worry if every small flower is perfectly identical. Slight variations in petal size actually enhance the handmade vintage appearance.
Part 5: Connecting the Floral Center
Now we begin transforming the circular floral motif into a square.
Attach the sage-green yarn.
Work around the floral section using combinations of:
- sc
- hdc
- dc
- chains
Place your stitches around the spaces between the flowers and leaves.
As you work, gradually increase at four evenly spaced points.
These four increase points become the corners of the granny square.
Corner Structure
A simple corner can be made with:
3 dc, ch 2, 3 dc
worked into the same corner space.
Continue around the motif.
At the end of the round, sl st to join.
Part 6: Blue Granny Square Border
Now switch to your beautiful vintage blue yarn.
This contrasting blue border gives the floral motif its classic granny-square appearance.
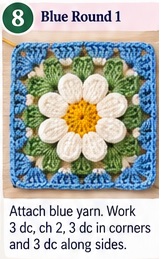
Blue Round 1
Attach blue yarn at one corner.
Ch 2.
Work 2 dc into the corner space.
Ch 2.
Work 3 dc into the same corner.
Continue along the side:
3 dc into the next available space.
Repeat across the side.
At each corner:
3 dc, ch 2, 3 dc
Continue around all four sides.
Sl st to the beginning.
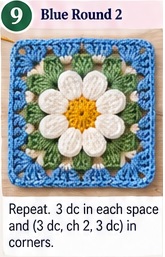
Blue Round 2
Ch 2.
Work 2 dc into the corner space.
Ch 2.
Work 3 dc into the same corner.
Work 3 dc into each granny-space along the side.
At every corner:
3 dc, ch 2, 3 dc
Continue around the square.
Join with a sl st.
Blue Round 3
Repeat the same granny-square structure.
Work:
3 dc in every side space
and:
3 dc, ch 2, 3 dc
in each corner.
Continue until the square reaches your desired size.
For the look shown in the photograph, a slightly thicker blue border works beautifully.
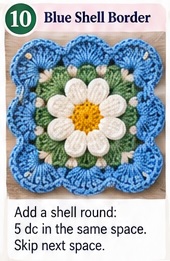
Decorative Blue Shell Border
For an extra vintage finish, add a decorative shell round.
Attach blue yarn along the outer edge.
A simple shell can be made with:
5 dc in the same stitch or space.
Skip the next space and work another 5-dc shell.
Continue around the square.
At the corners, you can work a larger shell or use:
5 dc, ch 2, 5 dc
to maintain the square shape.
This creates the lovely scalloped texture visible around the outer border.
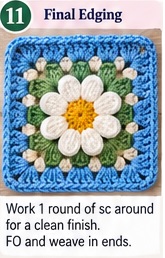
Final Edging
For a clean finished edge, work one round of sc around the entire square.
At each corner:
sc, ch 2, sc
This helps sharpen the corners and gives the square a polished finish.
Fasten off and weave in all ends securely.
How to Make the Flower More Raised
The dimensional appearance is one of the most beautiful features of this pattern.
For extra-height petals:
- Use slightly taller stitches.
- Pull the loops upward gently.
- Don’t flatten the completed petal.
- Keep the stitches gathered toward the center.
- Shape the petal with your fingers after completing it.
You can also place a second layer of smaller petals underneath the main white petals for an even more dramatic 3D flower effect.
Color Placement
For the vintage color palette shown:
| Section | Color |
|---|---|
| Flower center | Golden yellow |
| Main petals | Soft white |
| Leaves | Sage green |
| Small flowers | Warm ivory |
| Granny border | Vintage blue |
| Final edging | Vintage blue |
The combination of blue + sage green + ivory + golden yellow gives this square a charming retro cottage-garden feel.
Joining Multiple Squares
These floral squares would look beautiful joined into a blanket.
You can arrange them in a simple grid:
4 × 4 → small throw
5 × 5 → medium blanket
6 × 6 → large blanket
8 × 8 → generous bed-size project
For a traditional vintage look, alternate the direction of the flowers or add a few solid-color granny squares between the floral motifs.
Best Projects for This Granny Square
This raised daisy square can be used for much more than blankets.
🌼 Floral Granny Blanket
Make dozens of squares and join them with a contrasting neutral yarn.
🛋 Cushion Cover
Four large squares can create a beautiful vintage floral cushion.
👜 Crochet Bag
Use 6–8 squares to make a colorful floral tote.
🧥 Crochet Cardigan
Join multiple squares to create a unique retro cardigan or vest.
🧺 Table Runner
Arrange the squares end-to-end and add a scalloped border.
🎒 Granny Square Tote
The dimensional flowers make this particularly attractive for handmade bags.
Tips for Perfect Results
Keep your tension consistent.
Uneven tension can cause the floral center to become wavy.
Don’t over-tighten the petals.
The raised effect depends on allowing the stitches to retain some height.
Block the finished square.
Blocking is especially useful when the center contains several layers of petals and leaves.
Use cotton yarn for definition.
Cotton makes the raised stitches and floral details particularly crisp.
Secure the flower center well.
Because the petals are raised, weave your ends securely on the back.
FAQ
Is this granny square beginner friendly?
The granny-square border is beginner friendly, but the dimensional flower and layered leaves are better suited to an intermediate crocheter.
What yarn is best?
Worsted-weight cotton or cotton-blend yarn is an excellent choice. It provides enough structure for the raised flower.
Can I use different colors?
Absolutely. Try pink and cream for a romantic floral square, lavender and green for a cottage-garden palette, or yellow, orange, and green for a cheerful summer version.
Can I make the square larger?
Yes. Simply continue adding granny-square rounds around the floral center until you reach your preferred dimensions.
Does the flower have to be white?
No. The raised petals would look beautiful in blush pink, lavender, pale yellow, coral, or even a multicolor palette.
🌸 Final Thoughts
The Vintage Raised Daisy Floral Granny Square is a wonderful combination of classic granny-square construction and dimensional crochet flowers. The raised white daisy creates a beautiful focal point, while the sage leaves, cream blossoms, and blue granny border give the finished square a nostalgic handmade character.
Make one as a decorative motif, or crochet a whole collection and turn them into a stunning vintage floral blanket.

