

 soofha
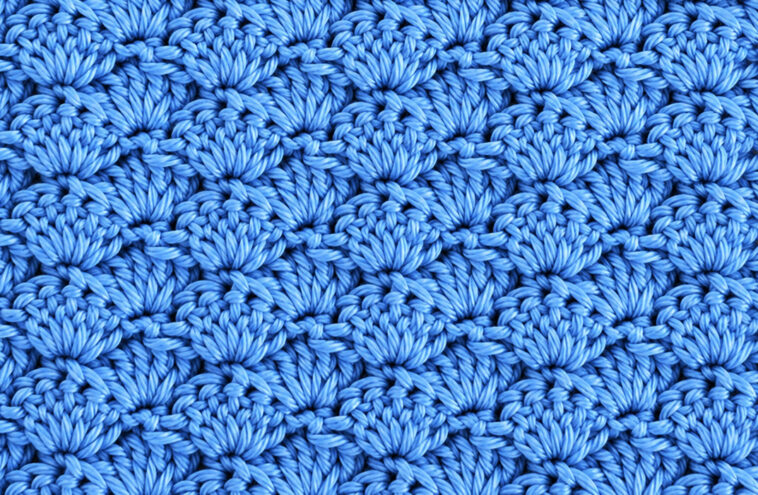
Learn how to crochet the beautiful Shell Stitch with this beginner-friendly tutorial. With its graceful scalloped texture and cozy appearance, this stitch is a wonderful choice for blankets, scarves, baby projects, washcloths, and many other handmade creations.
If you’re searching for a crochet stitch that looks detailed but is actually easy to master, the Shell Stitch is a fantastic place to start.
Why You’ll Love the Crochet Shell Stitch
The Shell Stitch has been one of my favorite crochet patterns for years. It creates a lovely combination of texture and softness without requiring complicated techniques.
It was also one of the first decorative stitch patterns I learned when I began crocheting, and it remains a useful stitch for many different projects.
One of the best things about this stitch is that it looks much more complicated than it really is. Once you understand the basic repeat, the pattern becomes easy to remember and works up beautifully.
The rounded groups of double crochet stitches create a charming scalloped effect, giving finished projects a classic and elegant look.
There are many different ways to crochet a Shell Stitch. The version featured in this tutorial creates a relatively dense fabric with small spaces between the stitches. Because of its cozy texture, it works especially well for warm blankets, baby blankets, washcloths, and other practical projects.
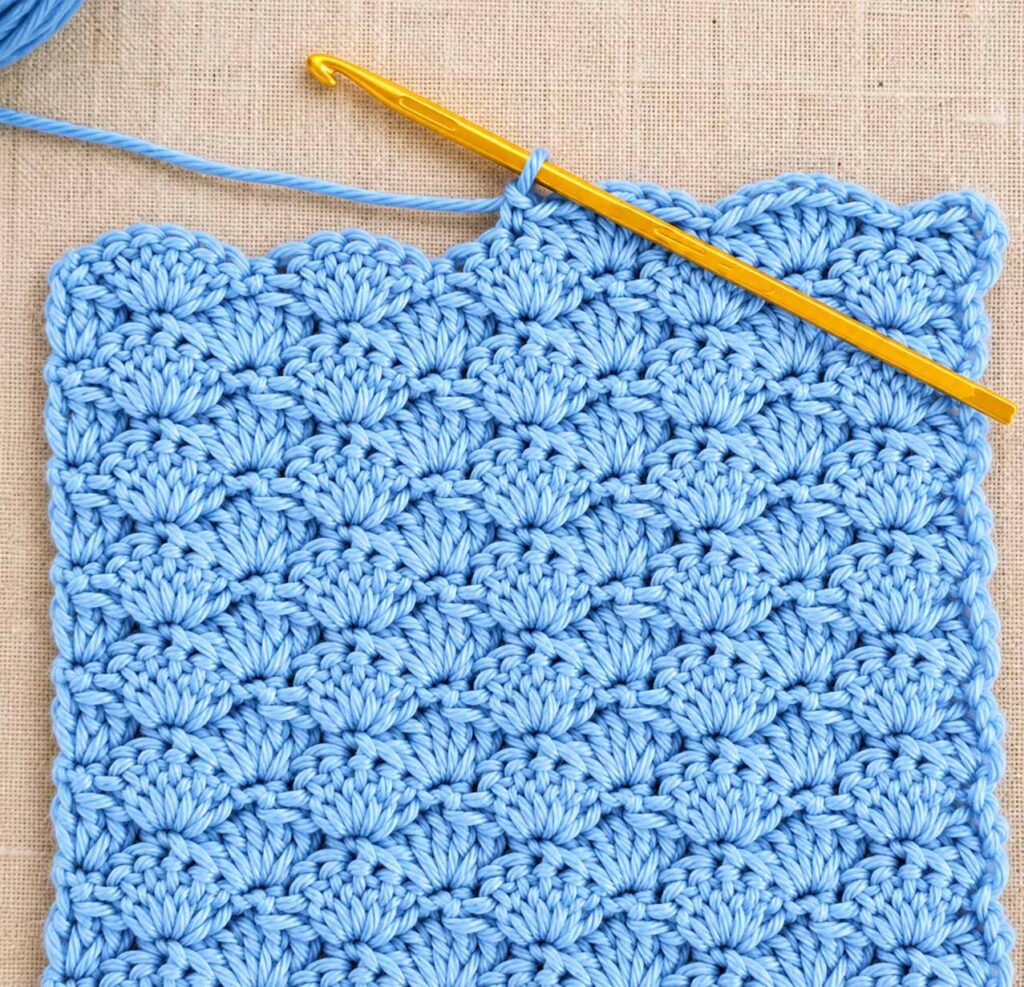
Crochet Shell Stitch Project Ideas
Once you become comfortable with the Shell Stitch, you can use it for much more than a simple practice swatch. Here are some project ideas to try:
Scarves and Shawls
Create a soft scarf or lightweight shawl with repeating shells. Choose a solid color for a classic look or combine several shades for a colorful design.
Baby Blankets
The pretty scalloped texture makes the Shell Stitch an excellent option for baby blankets. Soft pastel colors can create a delicate nursery look, while brighter shades can give the blanket a more playful style.
Dishcloths and Washcloths
Use cotton yarn to crochet useful dishcloths and washcloths. The textured stitches add visual interest while keeping the project simple enough for beginners.
Crochet Headbands
A Shell Stitch headband is a quick project that allows you to practice the stitch while creating a practical handmade accessory.
Home Decor
The stitch can also be used for decorative projects such as pillow covers, table runners, placemats, and coasters. Its textured appearance can add a handmade touch to your home.
Materials You’ll Need
Before starting your Shell Stitch practice piece, gather the following supplies:
- Yarn of your choice
- Crochet hook — 5.00 mm (H/8)
- Scissors
- Yarn needle
For beginners, a smooth, medium-weight yarn is often easier to work with because the individual stitches are easier to see.
Crochet Shell Stitch Tutorial
For this tutorial, we’ll begin with a foundation row of single crochet and then build the Shell Stitch pattern over the following rows.
Row 1
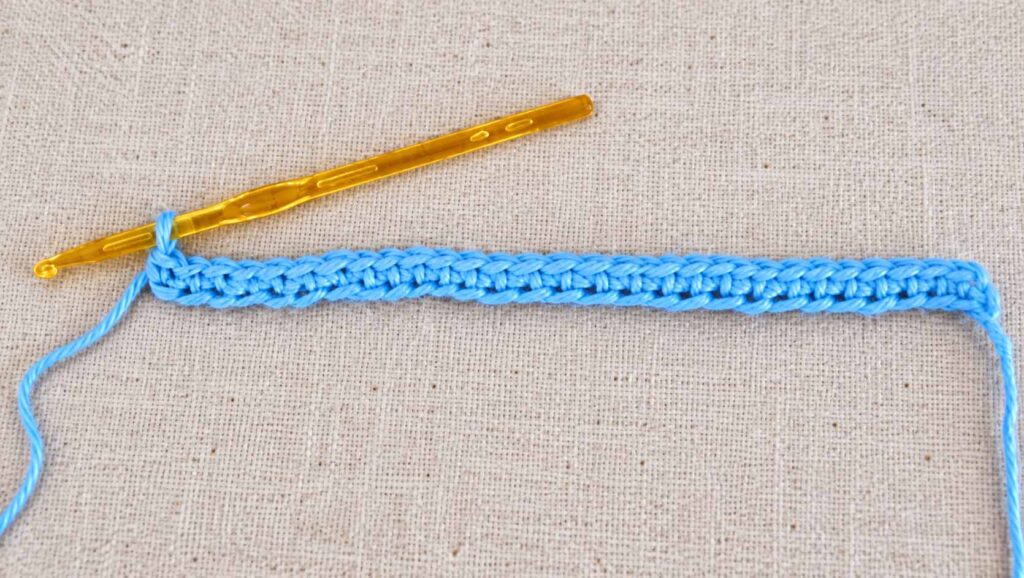
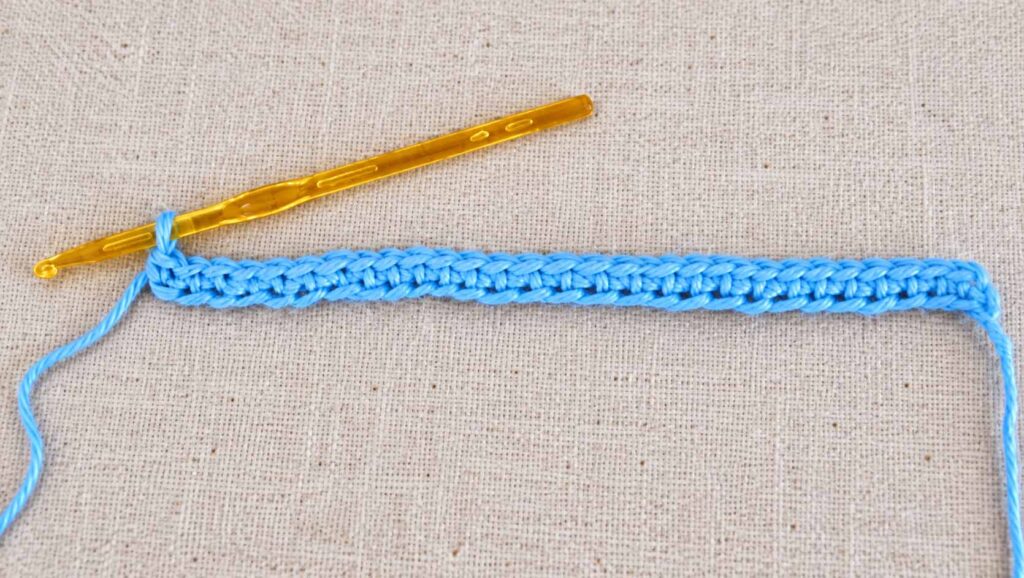
Row 1: Foundation Row
Begin by making a foundation row of single crochet stitches.
You can start with a traditional chain and work one single crochet into each chain, or use a foundation single crochet (FSC) if you prefer.
The important part is to have a stitch count that follows the Shell Stitch repeat:
Multiple of 6 + 1
For this sample, we’ll use 31 single crochet stitches, which creates five shells across the row.
Once your foundation row is complete, you’re ready to begin creating the shells.
Row 2: Creating the First Shells
Chain 1 and work 1 single crochet in the same stitch.
Next, skip the next 2 stitches.
In the following stitch, work 5 double crochet stitches into the same stitch. These five double crochets form your first shell.
Now skip the next 2 stitches and work 1 single crochet in the following stitch.
Your first complete Shell Stitch repeat is finished.
Continue across the row using the same sequence:
Skip 2 stitches, 5 double crochets in the next stitch, skip 2 stitches, 1 single crochet in the next stitch.
Repeat this pattern until you reach the end of the row.
You should now have a row of beautiful, rounded shells.
Row 3: Offset the Shells
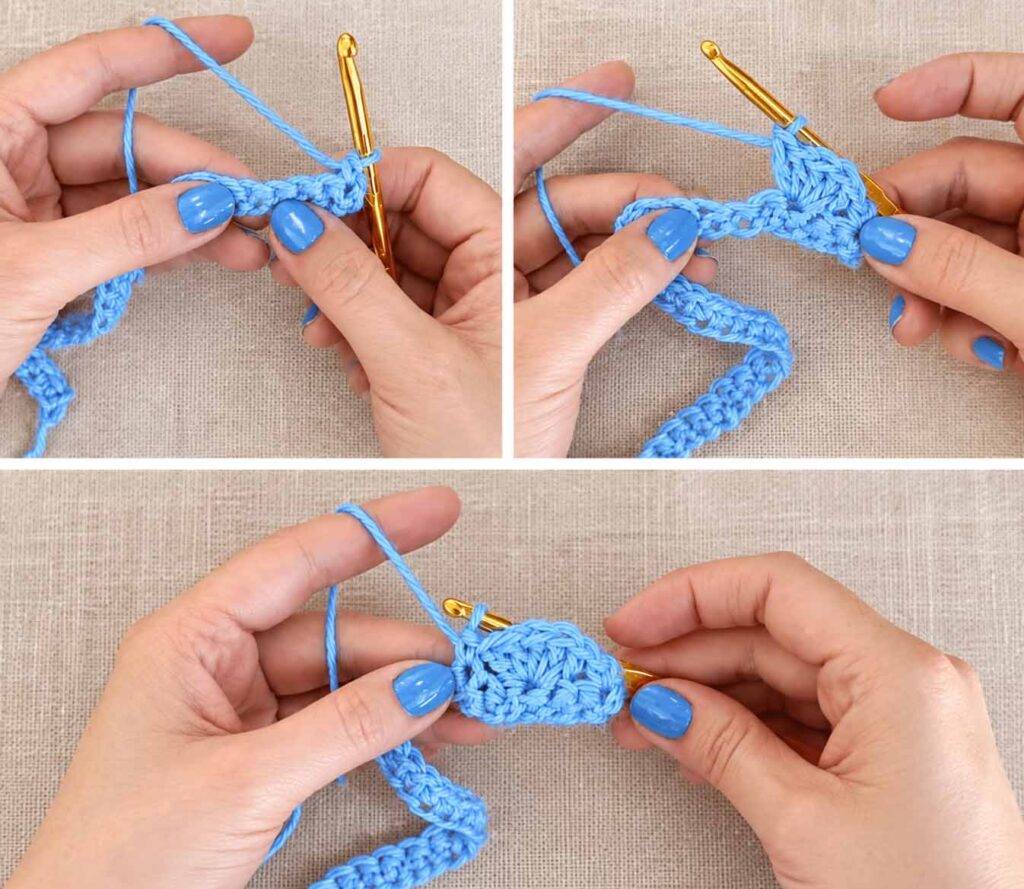
The third row is very similar to Row 2, but this time the shells are shifted so they sit between the shells from the previous row.
This creates the attractive staggered appearance of the pattern.
Begin by chaining 3. Work 2 double crochet stitches in the same stitch.
Next, locate the center double crochet of the first shell from Row 2. Work 1 single crochet into that middle stitch.
You have now created your first half shell.
Next, work 5 double crochet stitches into the next single crochet stitch from the previous row. This creates a complete shell between the shells below it.
Then work 1 single crochet into the center double crochet of the next shell.
Continue repeating the following sequence across the row:
5 double crochets in the next single crochet, 1 single crochet in the center double crochet of the next shell.
When you reach the final stitch, finish the row by working 3 double crochet stitches into the last single crochet stitch of the previous row.
Your third row is now complete.
Continue Repeating the Pattern
Once you have completed Rows 2 and 3, the rest of the pattern is wonderfully simple.
Continue repeating:
- Row 2
- Row 3
- Row 2
- Row 3
Keep repeating these two rows until your project reaches your desired length.
As you work more rows, the distinctive scalloped Shell Stitch pattern will become increasingly visible.
Helpful Tips for Beginners
If this is your first time working the Shell Stitch, don’t worry if the first few rows take a little extra concentration. After a few repeats, the stitch sequence becomes much easier to recognize.
Here are a few tips to help:
Count Your Foundation Stitches
Remember that your starting stitch count should follow the formula:
6 × number of shells + 1
Keeping the correct stitch count at the beginning will help prevent problems later.
Find the Center of Each Shell
When working Row 3, identifying the middle double crochet of each shell is important. This is where your single crochet will be placed.
Keep Your Tension Consistent
Try to maintain an even crochet tension throughout the project. Consistent tension will help your shells look uniform and keep the fabric from becoming too tight or loose.
Practice With a Small Swatch
Before beginning a large blanket or scarf, make a small sample first. This gives you an opportunity to become familiar with the stitch repeat without committing to a large project.
Final Thoughts
The Crochet Shell Stitch is a wonderful pattern for beginners who want to move beyond basic crochet stitches and start creating more decorative textures.
Although the finished stitch has an intricate and elegant appearance, the actual technique is based on a simple repeating sequence of single crochet and double crochet stitches.
Once you have practiced the two-row repeat, you can use this stitch for all kinds of handmade projects, from cozy blankets and baby accessories to scarves, washcloths, and beautiful home decor.
Grab your favorite yarn and crochet hook, make a small swatch, and give this lovely Shell Stitch a try. With a little practice, you’ll be creating rows of beautiful crochet shells with confidence!

