

 soofha
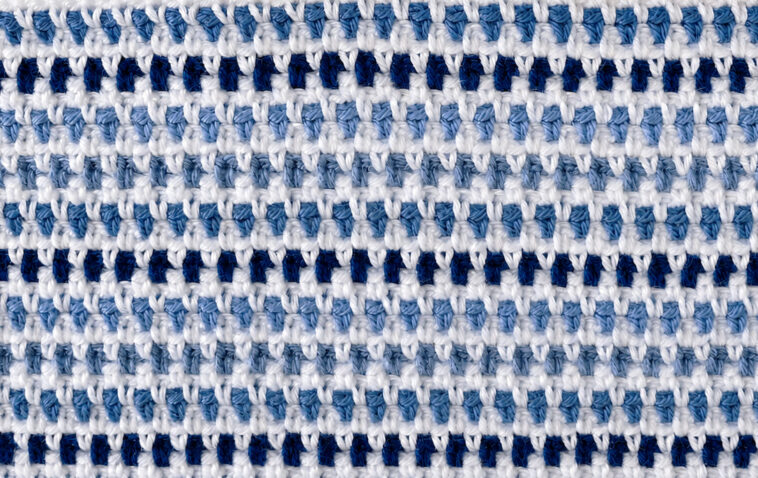
The Speckled Moss Stitch Baby Blanket is a simple, cozy crochet project with a beautiful striped texture. It uses the classic moss stitch throughout, making it a great choice for beginners who want to practice working with color changes without having to learn a complicated stitch pattern.
The blanket is worked with alternating rows of white and soft blue-toned shades. The result is a delicate speckled effect that looks especially lovely for a baby blanket, stroller blanket, or small nursery throw.
One thing to keep in mind is that the pattern involves changing colors frequently. That can mean quite a few yarn tails, but don’t worry! Below are a few practical ways to manage the ends so you can spend more time crocheting and less time weaving in yarn.
Why You’ll Love This Blanket
- Beginner-friendly moss stitch pattern
- Uses only basic crochet stitches
- Beautiful striped and speckled appearance
- Easy to customize in different colors
- Perfect size for a stroller or baby blanket
- Great project for practicing color changes
- Simple border that complements the stitch pattern
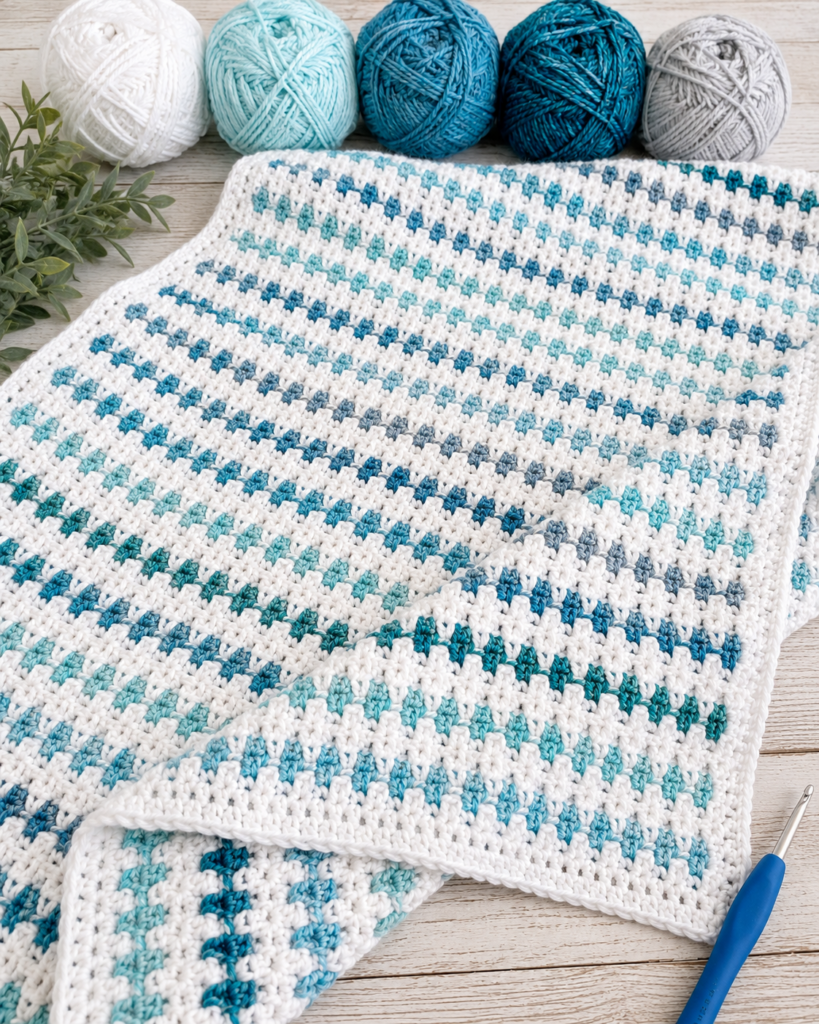
Materials
Yarn
Patons Canadiana
100% acrylic
100 g / 3.5 oz per skein
187 m / 205 yds per skein
For the sample blanket, you’ll need approximately:
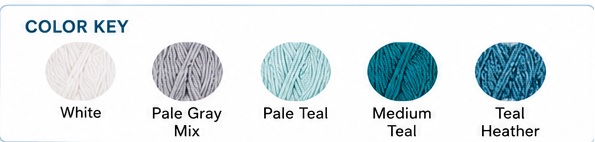
- 4 skeins White
- 1 skein Pale Teal
- 1 skein Medium Teal
- 1 skein Teal Heather
- 1 skein Pale Gray Mix
You can substitute another worsted-weight yarn if you prefer. Just keep in mind that your finished size and yarn requirements may vary slightly.
Crochet Hook
- H/5.00 mm crochet hook
Other Supplies
- Tapestry needle
- Scissors
- Foam board and pins for blocking, if desired
Finished Size
Approximately 27 x 28 inches (69 x 71 cm).
This makes a convenient stroller-size blanket, but the pattern is easy to resize. Simply adjust your starting chain to create a wider or narrower blanket.
Crochet Abbreviation
SC – Single Crochet: Insert the hook into the indicated stitch or space, yarn over and pull up a loop. Yarn over again and pull through both loops on the hook.
CH – Chain
SL ST – Slip Stitch
About the Moss Stitch
The moss stitch is one of those crochet stitches that looks much more complicated than it actually is. The basic pattern alternates single crochet stitches with chain spaces.
Once you get into the rhythm, the rows work up quickly and create a lovely woven texture without requiring complicated stitch combinations.
If this is your first time making moss stitch, it can be helpful to practice a small swatch before beginning the blanket.
Speckled Moss Stitch Baby Blanket Pattern
Starting Chain
With White, chain 130.
For a larger or smaller blanket, you can use any even number of chains.
The starting chain determines the width of your blanket, while repeating the pattern determines its length.
Row 1
Starting in the 4th chain from the hook, work:
SC, CH 1
Skip the next chain and work another SC, CH 1.
Continue this sequence across the row, working a single crochet and chain 1 while skipping the appropriate chain between stitches.
Finish the row with a single crochet in the final chain.
Chain 2 and turn.
Row 2
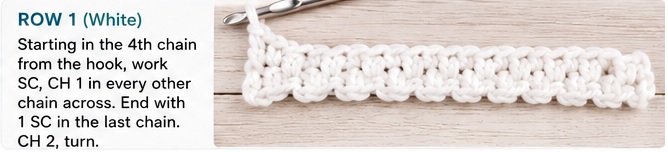
Work SC, CH 1 into the first chain-1 space from the previous row.
Skip the next stitch, then work SC, CH 1 into the following chain-1 space.
Continue working the same pattern across the row, placing your stitches into the chain-1 spaces from the previous row.
At the end of the row, work a single crochet between the final stitch and the turning chain.
Before completing the final single crochet, change to Pale Gray Mix by pulling the new color through the final two loops on your hook.
Chain 2 with the new color and turn.
Row 3
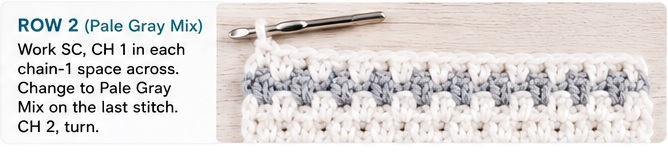
With Pale Gray Mix, repeat Row 2.
At the end of the row, change back to White as you complete the final single crochet.
Chain 2 and turn.

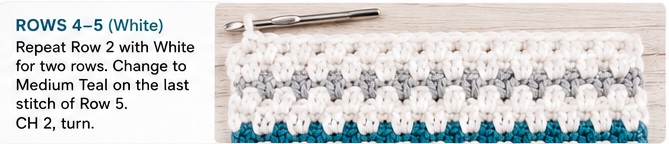
Rows 4–5
With White, repeat Row 2 for two rows.
At the end of Row 5, change to Medium Teal while completing the final single crochet.
Chain 2 and turn.
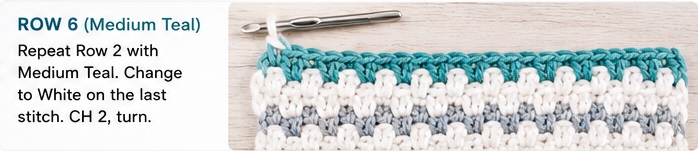
Row 6
With Medium Teal, repeat Row 2.
At the end of the row, change back to White on the final stitch.
Chain 2 and turn.
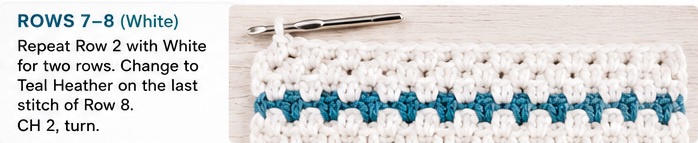
Rows 7–8
With White, repeat Row 2 for two rows.
At the end of Row 8, change to Teal Heather while completing the final single crochet.
Chain 2 and turn.
Row 9
With Teal Heather, repeat Row 2.
At the end of the row, change back to White on the final stitch.
Chain 2 and turn.

Rows 10–11
With White, repeat Row 2 for two rows.
At the end of Row 11, change to Pale Teal while completing the final single crochet.
Chain 2 and turn.

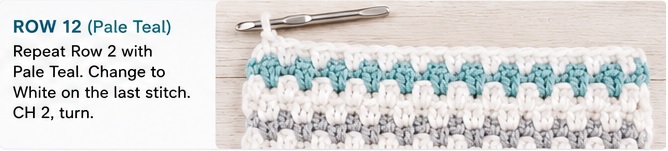
Row 12
With Pale Teal, repeat Row 2.
At the end of the row, change back to White on the final stitch.
Chain 2 and turn.
Repeat the Color Sequence
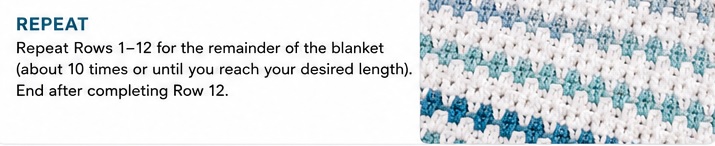
Rows 1–12 make up one complete color sequence.
Continue repeating these 12 rows until your blanket reaches the desired length.
For a finished blanket close to 27 x 28 inches, repeat the sequence approximately 10 times.
If you want a longer blanket, simply continue repeating the sequence.
How to Manage the Yarn Ends
Because the colors change frequently, you’ll have several yarn tails to deal with. Fortunately, there are a few ways to make this part much easier.
Option 1: Crochet Over the Ends
This is the method I prefer for this blanket.
Whenever you change colors, cut the old yarn and leave a tail of approximately 6 inches.
Instead of weaving the tail in immediately, lay it along the back of your work and crochet over it as you work the next row.
After you’ve worked another row and returned to the same side, you can crochet over the tail again. This gives the end extra security.
Once the blanket is finished, carefully trim any excess yarn.
The moss stitch works particularly well for this method because the yarn ends can be hidden between the stitches.
Option 2: Carry the White Yarn
Since white is used throughout most of the pattern, another option is to carry the white yarn up the side instead of cutting it after every section.
This reduces the number of white ends you’ll have to deal with later.
You will still need to cut the contrasting colors when their sections are finished, but it can save quite a bit of time and yarn.
If you are new to carrying yarn, practice on a small swatch first so you can get comfortable keeping the carried strand neat and not pulling the edge too tightly.
Option 3: Weave In Each End
Of course, you can always cut the yarn at every color change and weave in the ends individually with a tapestry needle.
It takes a little more time, but it gives the finished blanket a very tidy and traditional finish.
If you choose this method, I recommend dealing with the ends as you go rather than leaving every single one until the blanket is finished!
Simple Moss Stitch Border
For the border, I kept things uncomplicated.
The moss stitch already provides plenty of texture, so a simple two-round moss stitch border gives the blanket a neat finished edge without overwhelming the striped design.
Make sure your final two rows of the blanket are worked in White.
Round 1
After finishing the final row, chain 2.
Begin working down the side of the blanket.
Along the side edge, work:
SC, CH 1
approximately at the end of every other row.
When you reach a corner, work 3 SC into the corner space.
Continue around the blanket, working the moss stitch pattern along each side and placing 3 single crochets in each corner.
When you return to the starting corner, join with a slip stitch.
Chain 2 and turn.
Round 2
Repeat the same moss stitch border around the entire blanket.
Work SC, CH 1 along the sides and 3 SC in each corner.
When you reach the beginning corner, join with a slip stitch.
Fasten off and weave in the remaining end.
Blocking the Blanket
Blocking isn’t absolutely necessary, but it can make a big difference to the finished appearance.
Once the blanket is completely finished, gently wet it and carefully shape it to the desired dimensions.
Pin it to a clean piece of foam board, making sure the edges are straight and the corners are nicely squared.
Allow the blanket to dry completely before removing the pins.
Blocking can help even out the stitches and give your blanket a more polished, professional appearance.
Color Ideas
The original combination of white, pale teal, medium teal, teal heather, and pale gray creates a soft blue palette that works beautifully for a baby blanket.
However, the pattern is easy to personalize.
Try combinations such as:
- White, dusty pink, blush, and mauve
- Cream, sage green, eucalyptus, and gray
- White, lavender, lilac, and soft purple
- Cream, mustard, caramel, and beige
- White, navy, sky blue, and denim
- Ivory, peach, coral, and terracotta
You can also use leftover worsted-weight yarn from your stash to create a completely unique color combination.
Tips for Making the Blanket
Keep your tension consistent.
Moss stitch is forgiving, but consistent tension will help keep the blanket square and the edges even.
Change colors on the final stitch.
For clean color transitions, introduce the new color while completing the last stitch of the previous row.
Don’t pull the carried yarn too tightly.
If you carry white along the side, leave enough slack so the edge doesn’t pucker.
Count your stitches occasionally.
The moss stitch pattern is repetitive, which makes it easy to accidentally skip a space. Checking your stitch count every few rows can save you from having to unravel later.
Deal with yarn tails as you go.
Whether you crochet over them or weave them in immediately, managing the ends along the way makes finishing much less overwhelming.
Video Tutorial:
Final Thoughts
The Speckled Moss Stitch Baby Blanket is a relaxing project that combines a very simple stitch with beautiful color changes. Once you get comfortable with the moss stitch rhythm, most of the blanket becomes wonderfully repetitive, making it a great project to work on while watching your favorite show or listening to a podcast.
The soft stripes give the blanket a classic look, while the alternating colors add just enough interest to keep the project enjoyable.
Best of all, you can easily make it your own by changing the colors or adjusting the size.
I hope you enjoy making this blanket as much as I enjoyed putting the pattern together. When your blanket is finished, don’t forget to share your creation with other crochet lovers!

