

 soofha
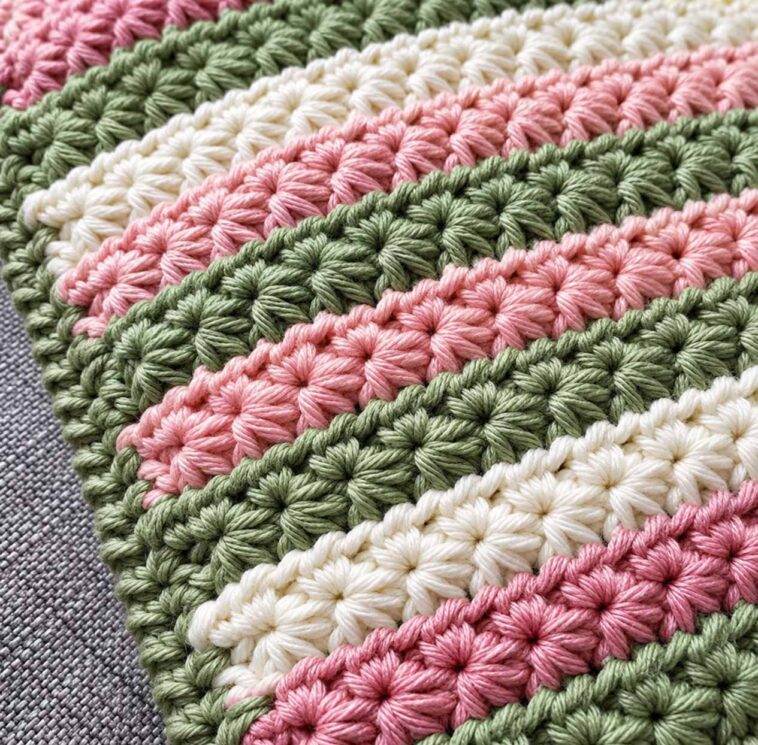
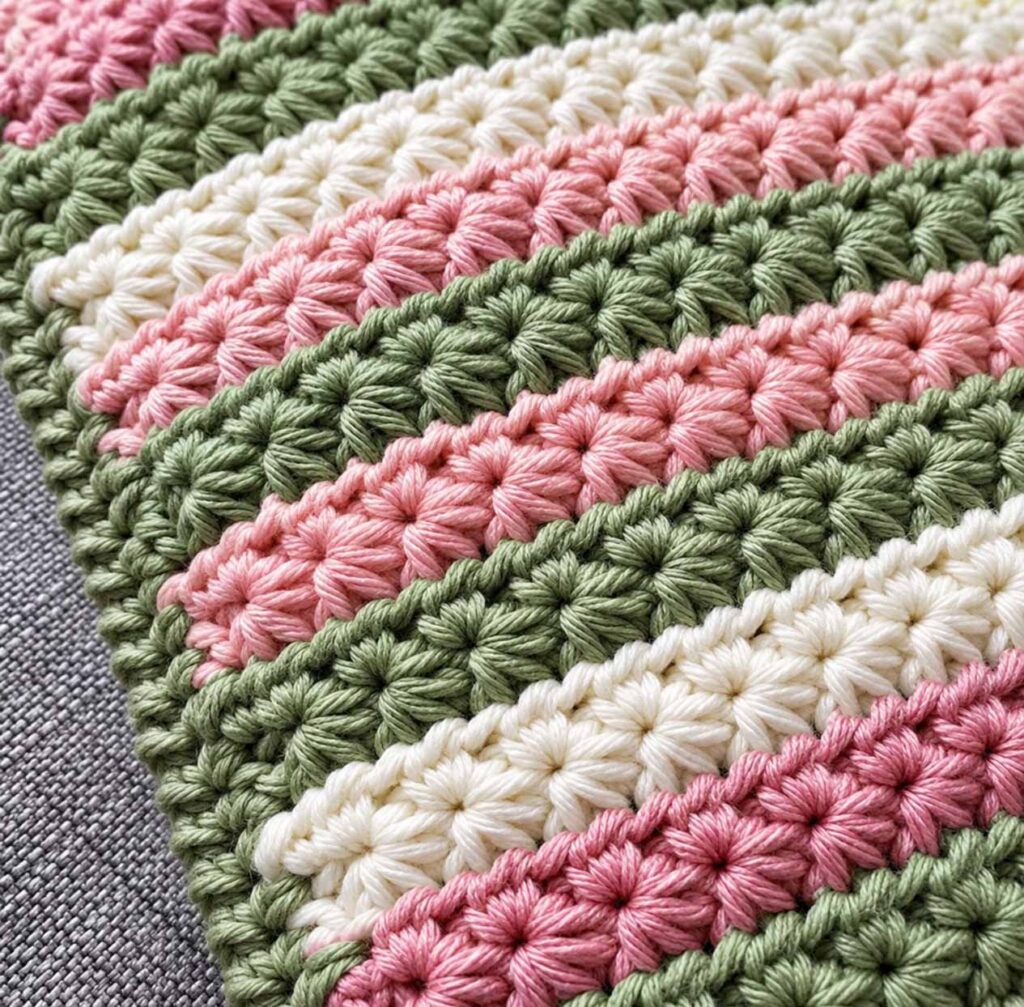
The Star Stitch is a gorgeous crochet stitch known for its distinctive star-shaped texture and beautifully dense fabric. It creates a rich, dimensional surface that looks especially lovely in blankets, scarves, cowls, hats, pillows, and other cozy crochet projects.
Although the stitch may look complicated at first, it becomes much easier once you understand how the loops are gathered together to form each star. This pattern is considered intermediate level, making it a wonderful project for crocheters who want to learn a new textured stitch and expand their skills.
Follow the step-by-step instructions below to learn how to crochet the Star Stitch.
Star Stitch Pattern Details
Skill Level: Intermediate
Stitch Multiple: Multiple of 2 + 7
Project Ideas: Blankets, scarves, cowls, hats, pillows, bags, and more
Note: Always use the crochet hook size recommended for your chosen yarn, or adjust the hook size if you need to achieve a particular gauge.
Materials Needed
- Yarn of your choice
- Crochet hook appropriate for your yarn
- Scissors
- Tapestry needle for weaving in ends
- Stitch markers, optional
Crochet Abbreviations
The pattern uses standard US crochet terminology.
- ch – chain
- yo – yarn over
- lp(s) – loop(s)
- sp – space
- st(s) – stitch(es)
- hdc – half double crochet
Understanding the Star Stitch
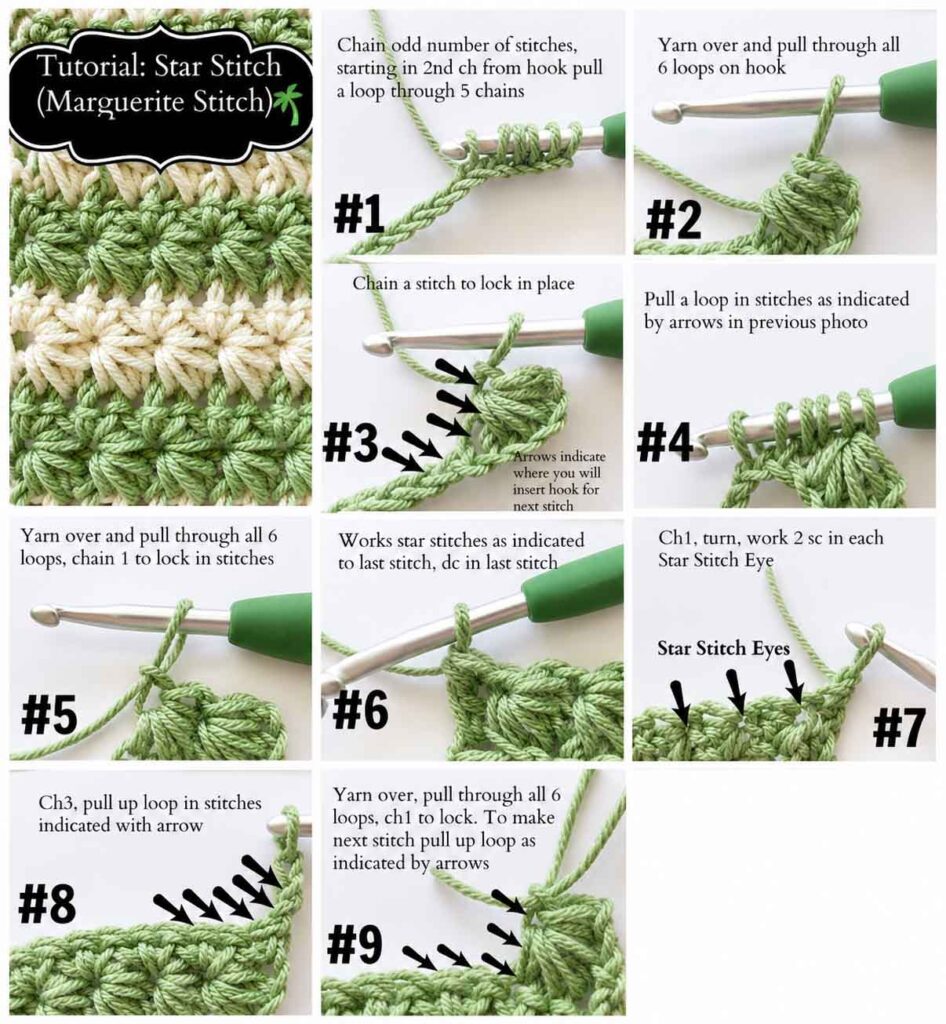
The Star Stitch is created by pulling up multiple loops and then working them off the hook together. Each completed star has a small chain-1 space in the center, often called the “eye” of the star.
The next star begins by working into the eye of the previous star, which helps create the beautiful continuous texture.
Don’t worry if your first few stars look uneven. Once your hands become familiar with where to insert the hook and how much yarn to pull up, the pattern becomes much more rhythmic.
How to Crochet the Star Stitch
For this sample, begin with a foundation chain of 19 chains.
Foundation Chain
Ch 19.
Make sure your foundation chain is neither too tight nor too loose. A relaxed foundation chain will make it easier to insert your hook during the first row.
Row 1: Create the First Row of Stars
Insert your hook into the 2nd chain from the hook.
- Yarn over and pull up a loop. You now have 2 loops on your hook.
- Insert your hook into the next chain, yarn over, and pull up a loop.
- Repeat this in the next 4 chains, keeping all the loops on your hook.
You should now have 6 loops on your hook.
Yarn over and pull through all 6 loops.
Ch 1 to close the star.
This chain-1 space forms the eye of the star.
Continue Across the Row
To make the next star:
- Insert your hook into the ch-1 eye of the star you just completed.
- Yarn over and pull up a loop.
- Working down the side of the same star, insert your hook between the last post and the next-to-last post along the edge.
- Yarn over and pull up a loop.
- Insert your hook into the chain at the base of the same star.
- Yarn over and pull up a loop.
You should now have 4 loops on your hook.
Next, insert your hook into each of the next 2 chains, yarn over, and pull up a loop each time.
You should now have 6 loops on your hook.
Yarn over and pull through all 6 loops.
Ch 1 to close the star.
Repeat this process across the row until you reach the final chain.
Work 1 hdc into the last chain.
Turn your work.
Row 2: Work Across the Star Eyes
Ch 2.
The second row creates the base for the next row of stars.
Work 2 hdc into the ch-1 eye of each star across the row.
At the end of the row, work 1 hdc into the top of the final stitch/post.
Turn your work.
Tip: Keep your tension relaxed when working into the star eyes. This will help the next row of stars form evenly without becoming too tight.
Row 3: Create the Next Row of Stars
Ch 3.
Insert your hook into the 2nd chain from the hook, yarn over, and pull up a loop.
Insert your hook into the next chain, yarn over, and pull up another loop.
You should now have 3 loops on your hook.
Next, insert your hook into the next 3 stitches, yarn over, and pull up a loop after each insertion.
You should now have 6 loops on your hook.
Yarn over and pull through all 6 loops.
Ch 1 to secure the star.
You have now created your first star of Row 3.
Continue Across Row 3
For the next star:
- Insert your hook into the ch-1 eye of the star just completed.
- Yarn over and pull up a loop.
- Insert your hook between the last post and the next-to-last post on the edge of the same star.
- Yarn over and pull up a loop.
- Insert your hook into the stitch at the base of the same star.
- Yarn over and pull up a loop.
You now have 4 loops on your hook.
Insert your hook into each of the next 2 stitches, yarn over, and pull up a loop each time.
You should have 6 loops on your hook.
Yarn over and pull through all 6 loops.
Ch 1 to secure the star.
Repeat from the beginning of the star sequence across the row.
When you reach the ending turning chain, work 1 hdc into the top of the ending ch-2.
Turn your work.
Row 4: Repeat the Even Row
Repeat Row 2.
Ch 2.
Work 2 hdc into the ch-1 eye of each star across the row.
Work 1 hdc into the top of the final stitch/post.
Turn.
Pattern Repeat
Once you have completed the first four rows, the main pattern is easy to remember.
Repeat Rows 3 and 4 until your project reaches the desired length.
For this particular pattern, finish with Row 4.
The alternating star rows and half-double-crochet rows create the distinctive texture that makes this stitch so beautiful.
Star Stitch Crochet Pattern
Tips for Perfect Star Stitch Crochet
1. Keep Your Tension Consistent
The Star Stitch requires you to pull up several loops at once. If your tension changes from star to star, some stars may appear larger or smaller.
Try to pull each loop up to approximately the same height.
2. Don’t Pull the Loops Too Tight
This is one of the most important tips when learning the Star Stitch.
The loops need enough room to move comfortably on your hook. If you pull them too tightly, inserting your hook into the next spaces can become difficult.
3. Count Your Loops
Whenever a star is being formed, you should generally have 6 loops on your hook before pulling the yarn through them all.
Counting the loops can help you identify mistakes early.
4. Pay Attention to the Star Eye
The small ch-1 space in the center of each star is important because it is where the next star begins.
If you accidentally skip an eye, the pattern can quickly become uneven.
5. Use Stitch Markers
If you are new to this stitch, place a stitch marker at the beginning or end of a row.
Markers can make it much easier to identify the correct turning point and maintain straight edges.
6. Make a Small Swatch First
Before beginning a large blanket or other project, make a small sample.
This gives you a chance to practice the star formation, check your tension, and decide whether you like the fabric created by your chosen yarn and hook.
What Can You Make With the Star Stitch?
The Star Stitch creates a dense, textured fabric, making it suitable for many crochet projects.
Try using it for:
- Cozy crochet blankets
- Baby blankets
- Winter scarves
- Cowls
- Crochet pillows
- Hats and beanies
- Bags and totes
- Shawls
- Baby accessories
- Decorative home projects
It is particularly beautiful when worked in a single color because the texture becomes the main focal point. However, changing colors between rows can create an entirely different look.
Final Thoughts
The Star Stitch Crochet Pattern is a wonderful technique to add to your crochet collection. Its repeating star-shaped texture gives handmade projects a beautifully detailed appearance while creating a warm and substantial fabric.
At first, keeping several loops on your hook may feel a little challenging, but with practice, the stitch quickly becomes easier and more natural. Once you understand the relationship between the star, its center eye, and the stitches worked between the stars, you will be able to crochet the pattern with confidence.
Start with a small swatch, practice your tension, and take your time with the first few rows. Before long, you’ll have the rhythm of the Star Stitch down and be ready to incorporate this beautiful texture into blankets, scarves, and other crochet creations.
Happy crocheting, and enjoy creating your beautiful Star Stitch projects!

