

 soofha
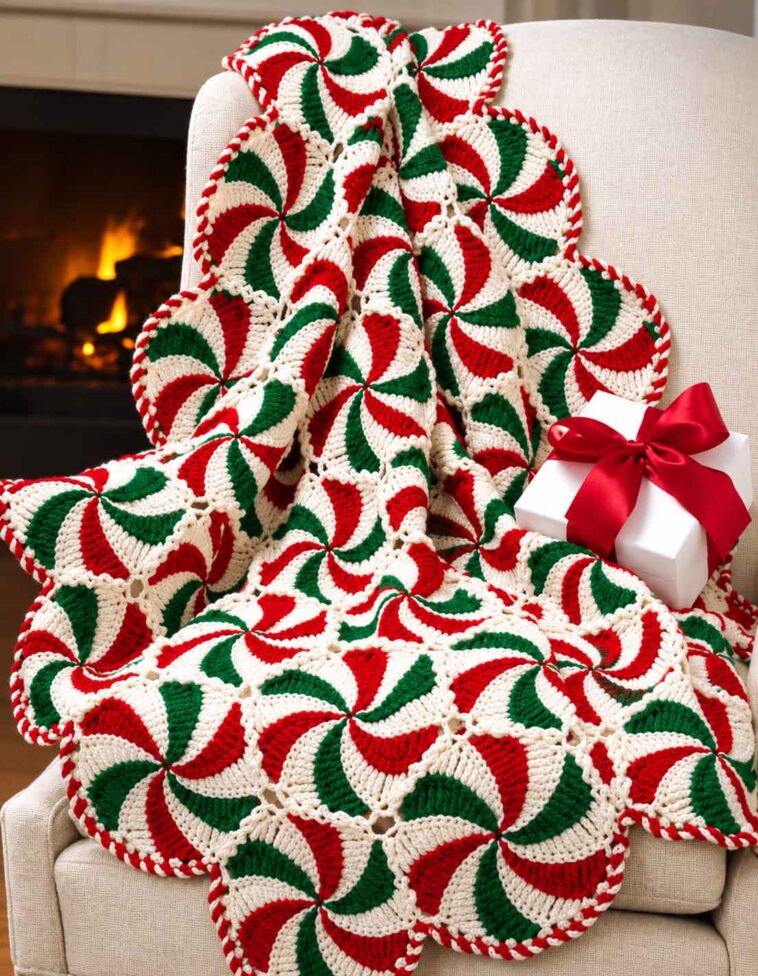
There’s something special about a handmade blanket that brings a little extra warmth and personality into a room. The Starlight Afghan is a lovely example, with its textured motifs, contrasting colors, and repeating details that come together to create an eye-catching design.
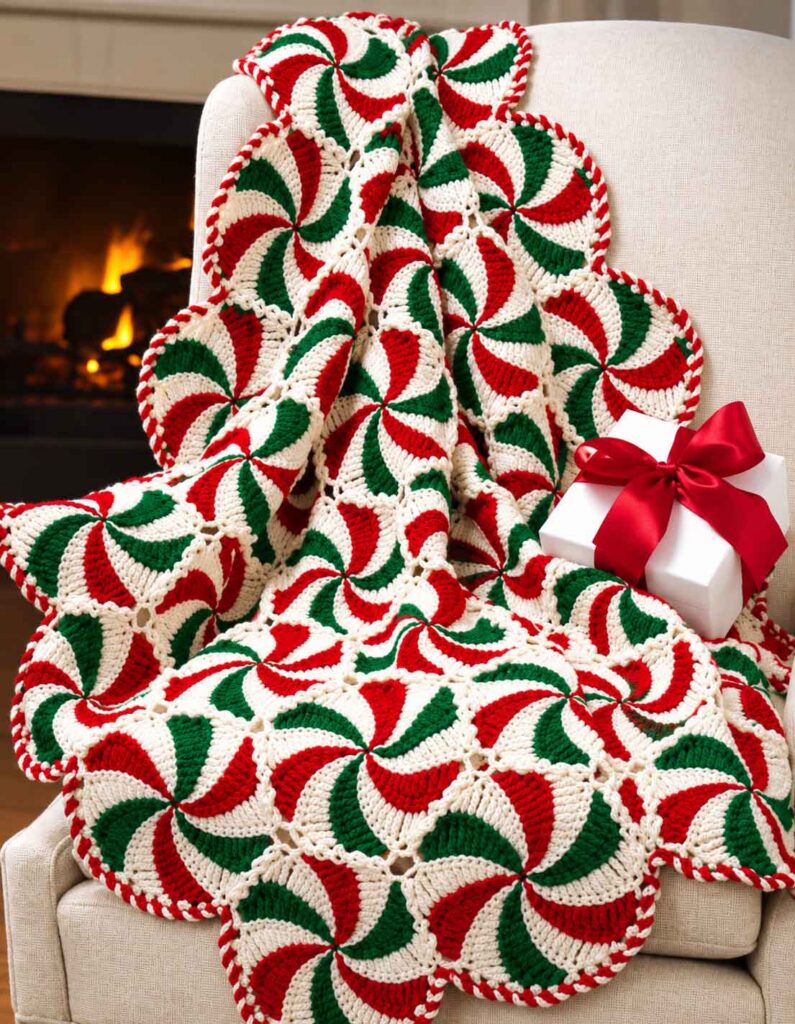
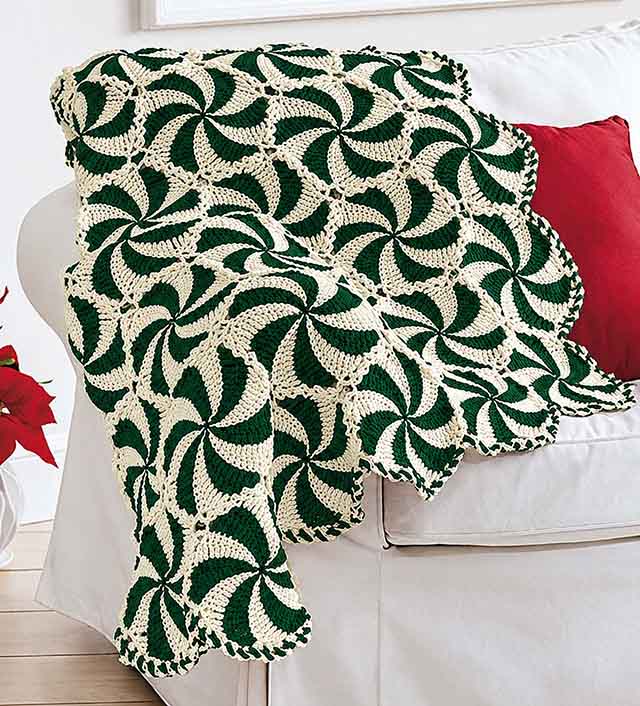
This blanket is made from individual crochet motifs worked in red and off-white yarn. Each motif is built row by row, creating a distinctive shape with textured stitches along the edges. Once the motifs are finished, they are joined together to form the larger afghan, and a decorative border gives the blanket a neat, finished look.
One of the nicest things about this pattern is the way the two colors work together. Red adds a bold, cheerful touch, while off-white softens the overall design and helps the texture stand out. You can keep the traditional color combination or experiment with your own shades to match your home decor.
The pattern involves some special stitch work and careful joining, so it’s a satisfying project for crocheters who enjoy working with individual motifs. Take your time with each section, keep track of your rows, and the finished blanket will gradually come together.
About the Starlight Afghan Pattern
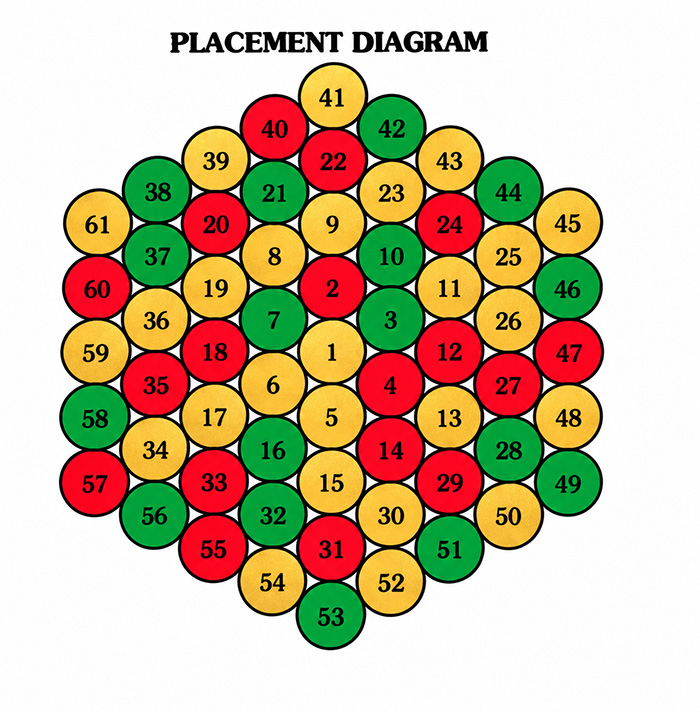
The Starlight Afghan is constructed from 61 individual motifs: one first motif, one second motif, and 59 additional motifs. Each motif is worked separately before being joined to the others.
The first motif establishes the starting point for the blanket. The second motif introduces the joining technique, while the remaining motifs are attached according to their positions in the placement diagram.
The pattern uses single crochet, half double crochet, double crochet, treble crochet, and a special cluster stitch. Some rows are worked through the back loops only to create additional texture and definition.
Because the motifs are joined as you work around their edges, keeping your stitches even and following the joining sequence carefully will help the finished blanket lie flat.
Materials and Preparation
- Red yarn
- Off-white yarn
- Crochet hook appropriate for your chosen yarn
- Stitch markers or short pieces of yarn
- Scissors
- Yarn needle for weaving in ends
Note: The supplied instructions do not specify a yarn brand, yarn weight, hook size, or finished blanket measurements. Check the original pattern source for these details before beginning.
Crochet Abbreviations
The following abbreviations are used throughout the pattern.
- ch: Chain
- sc: Single crochet
- hdc: Half double crochet
- dc: Double crochet
- tr: Treble crochet
- sl st: Slip stitch
- YO: Yarn over
- BLO: Back loops only
- Rnd: Round
- RS: Right side
- WS: Wrong side
Special Stitch Instructions
Treble Crochet (tr)
Yarn over twice and insert your hook into the indicated stitch. Yarn over and pull up a loop, leaving four loops on your hook. Yarn over and draw through two loops at a time, three times, until one loop remains.
Cluster Stitch
This cluster uses the last three stitches of the row.
- Yarn over twice and insert the hook into the next stitch.
- Yarn over and pull up a loop, leaving four loops on the hook.
- Yarn over and draw through two loops twice.
- Repeat the preceding steps once in the next stitch, then yarn over and draw through two loops, leaving four loops on the hook.
- Yarn over once and insert the hook into the last stitch. Yarn over and pull up a loop, leaving six loops on the hook.
- Yarn over and draw through two loops five times to complete the cluster.
First Motif
Using red yarn, loosely chain 14.
Row 1 — Right Side
Work a single crochet into the fifth chain from the hook to form a ring. Work a half double crochet into the next chain, a double crochet into the following chain, two double crochets into the next chain, one double crochet into the next chain, two treble crochets into the next chain, and one treble crochet into the next chain.
Finish the row by working the cluster stitch.
Tip: Place a small piece of yarn around a stitch in Row 1 to identify the right side of the motif. This marker will help you keep the work oriented correctly as you continue.
Row 2
Chain 1 and turn. Work a single crochet into each stitch across and into the ring. Change to off-white yarn during the final single crochet, leaving the red yarn attached.
From this point onward, carry the unused color along the wrong side of the work.
Row 3
Chain 1 and turn. Working through the back loops only, skip the first single crochet. Work one single crochet into the next stitch, one half double crochet into the following stitch, one double crochet into the next stitch, two double crochets into the next stitch, one double crochet into the next stitch, two treble crochets into the next stitch, and one treble crochet into the next stitch.
Finish with the cluster stitch.
Row 4
Chain 1 and turn. Work a single crochet through both loops of each stitch across, then work a single crochet into the ring. Change to red yarn during the final single crochet, leaving the off-white yarn attached.
Row 5
Chain 1 and turn. Working through the back loops only, skip the first single crochet. Work one single crochet into the next stitch, one half double crochet into the following stitch, one double crochet into the next stitch, two double crochets into the next stitch, one double crochet into the next stitch, two treble crochets into the next stitch, and one treble crochet into the next stitch.
Finish with the cluster stitch.
Row 6
Chain 1 and turn. Work a single crochet through both loops of each stitch across, followed by a single crochet into the ring. Change to off-white yarn during the final single crochet, leaving the red yarn attached.
Rows 7–23
Repeat Rows 3–6 four times, then work Row 3 once more.
At the end of Row 23, cut the red yarn.
Row 24
Chain 1 and turn. Work a single crochet through both loops of every stitch across, then work a single crochet into the ring.
Row 25 — Joining Row
Turn the work. Hold the right sides together and align the free loops of the beginning chain with the back loops of Row 24.
Skip the first single crochet on Row 24, then slip stitch loosely across the row to join the two edges.
Starlight Afghan Crochet Pattern
Decorative Trim for the First Motif
Chain 2. With the right side facing and working into the row ends, slip stitch into Row 24.
Chain 3 and slip stitch into the second loop of the next row. Chain 3 again and slip stitch into the fourth loop of that same row.
Continue along the edge, alternating between slip stitches into the row ends and slip stitches into the second and fourth loops of the intervening rows, with chain-3 spaces between them.
Place a stitch marker around the designated chain-3 space for joining placement. Continue the established sequence around the edge.
Finish off when you have completed 36 chain-3 spaces.
The chain spaces form the decorative edge used to connect the motifs and create the finished blanket.
Second Motif
Work the second motif in the same way as the first motif, following Rows 1–25.
Joining Trim
Chain 2. With the right side facing and working into the row ends, slip stitch into Row 24.
Continue making chain-3 spaces and slip stitches along the edge, following the same sequence used for the first motif. Mark the designated chain-3 space to identify the joining point.
Continue around the motif, following the original joining sequence, and finish off.
The second motif is joined to the first according to the placement diagram. Check the original diagram to confirm the correct orientation and joining points before proceeding.
Additional 59 Motifs
Make 59 more motifs, following the instructions for the first motif through Row 25.
For the joining trim, use the placement diagram to determine where each motif belongs. Depending on its position in the blanket, each motif will be joined along either two or three sides.
Follow the appropriate instructions below for two-side or three-side joining. Working in the correct order is important because some motifs connect to one neighboring motif, while others connect to two.
Joining Two Sides
Chain 2. With the right side facing and working into the row ends, slip stitch into Row 24.
Continue the decorative trim sequence, using chain-3 spaces and slip stitches along the edge. Place a stitch marker around the designated chain-3 space.
Continue the trim sequence for six repetitions.
Chain 1. Hold the motifs with their wrong sides together and slip stitch into the marked chain-3 space on the previously completed motif.
Chain 1, then slip stitch into the second loop of the next row on the new motif.
Continue joining the two motifs by alternating chain-1 stitches with slip stitches into the corresponding chain-3 spaces and row-end loops. Work across the marked joining section, matching the spaces on the previous motif with the appropriate points on the new motif.
Repeat the joining sequence as indicated in the original pattern, then join with a slip stitch to the first slip stitch on the new motif.
Finish off.
Joining tip: Keep the chain-1 spaces consistent and avoid pulling the slip stitches too tightly. Even tension helps the joined edges remain flexible and prevents the blanket from puckering.
Joining Three Sides
Chain 2. With the right side facing and working into the row ends, slip stitch into Row 24.
Continue working the chain-3 spaces and slip stitches along the edge, placing a marker around the designated chain-3 space.
Repeat the trim sequence four times.
Chain 1. Hold the motifs with their wrong sides together and slip stitch into the marked chain-3 space on the previously completed motif.
Chain 1, then slip stitch into the second loop of the next row on the new motif.
Continue joining the motifs by alternating chain-1 stitches with slip stitches into the corresponding chain-3 spaces and row-end loops. Match each space on the previous motif with the appropriate stitch or space on the new motif.
Repeat the joining sequence as indicated in the original instructions, then join with a slip stitch to the first slip stitch on the new motif.
Finish off.
Important: The original pattern refers to a placement diagram and uses repeat markers to identify parts of the joining sequence. Those references are necessary to establish the exact joining order, so consult the original diagram when working these sections.
Edging
Once all 61 motifs have been joined, finish the blanket with the two-round decorative edging.
Round 1 — Red
With the right side facing, join red yarn with a slip stitch in any joining slip stitch.
Chain 4, then slip stitch into the next unworked chain-3 space. Chain 4 again and slip stitch into the following unworked chain-3 space.
Continue around to the next joining slip stitch. Work a chain-4 space, slip stitch into the joining slip stitch, and chain 4 again.
Continue working chain-4 spaces and slip stitches into the unworked chain-3 spaces, repeating the established sequence around the blanket.
Join with a slip stitch to the first slip stitch and finish off.
Round 2 — Off-White
With the right side facing, join off-white yarn with a slip stitch in any chain-4 space.
Chain 4, then drop the loop from your hook. Insert the hook from front to back through the next chain-4 space, pick up the dropped loop, and pull it through that space.
Chain 4 again and repeat this technique around the blanket, passing the loop through each successive chain-4 space.
Join with a slip stitch to the first slip stitch and finish off.
This final round adds a decorative interlocking effect to the border and complements the textured motif design.
Tips for a Neat, Beautiful Finish
Keep track of the right side. Marking Row 1 makes it easier to keep every motif facing the correct direction.
Watch your color changes. Change colors during the final single crochet as instructed, and carry the unused yarn along the wrong side without pulling it too tightly.
Use stitch markers. The marked chain-3 spaces are important for joining. Mark them carefully so you can identify the correct joining points later.
Maintain consistent tension. The chain spaces need to remain loose enough for the joining slip stitches to fit comfortably. Tight chains can make the edges difficult to join and may cause the blanket to bunch up.
Follow the placement diagram. Before attaching each new motif, check its position and the number of sides that need joining. This is especially important for motifs that connect along two or three sides.
Weave in loose ends. Once the blanket is complete, secure the yarn ends neatly on the wrong side.
Final Thoughts
The Starlight Afghan is a rewarding project for anyone who enjoys textured crochet and the process of building a larger blanket from individual motifs. The combination of red and off-white gives the design a classic look, while the repeated stitches and decorative edging bring plenty of detail to the finished piece.
Take the project one motif at a time, paying attention to the color changes and joining points. As the pieces come together, you’ll see the pattern develop into a distinctive blanket that can add handmade charm to a sofa, bed, or favorite reading chair.
Choose colors that suit your style, keep your stitches consistent, and enjoy watching your Starlight Afghan grow into a finished piece made with care.

