

 soofha
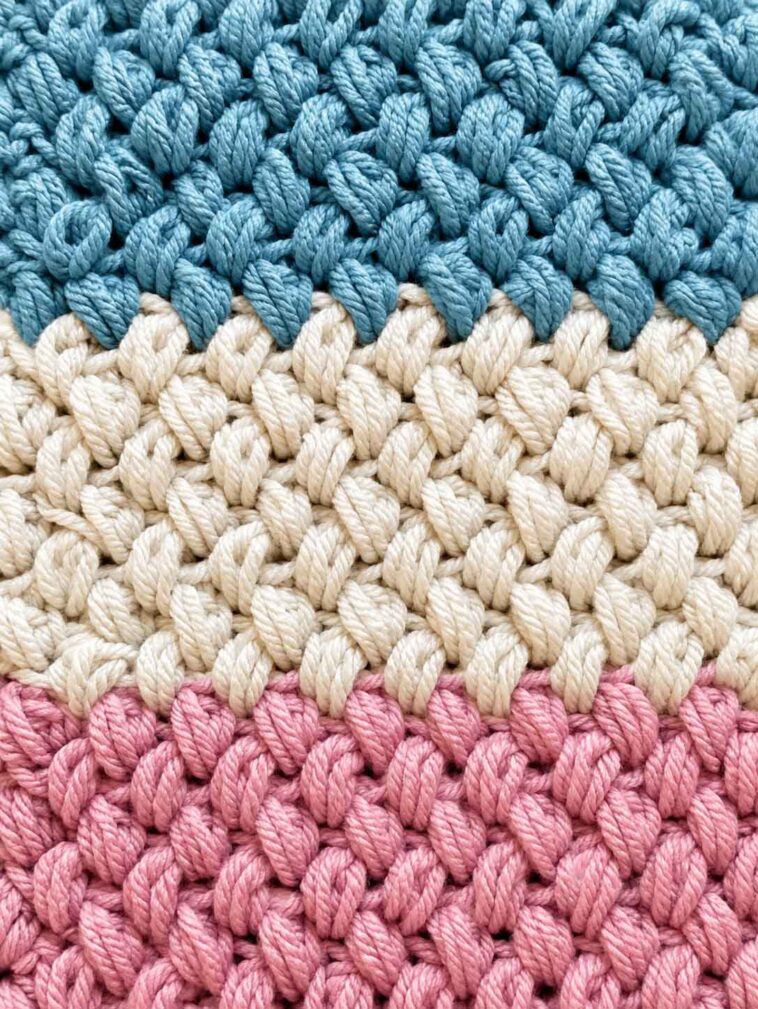
If you love crochet projects with plenty of texture, the Bean Stitch is definitely one to try. It creates little raised, puffy stitches that almost look like tiny beans sitting across the fabric. The finished texture is soft, cozy, and eye-catching without being overly complicated.
I especially like this stitch for blankets and scarves because it gives a simple project a little more personality. It also works beautifully for baby blankets, cowls, dishcloths, and other projects where you want a thicker, more textured fabric.
The Bean Stitch may look a little complicated when you first see it, but once you get the hang of making the loops and working them together, the stitch becomes quite easy to repeat.
What Is the Bean Stitch?
The Bean Stitch is a dense crochet stitch made by working several loops into the same stitch and then pulling them together. This creates the rounded, raised texture that gives the stitch its name.
Because the stitch is fairly dense, it produces a warm fabric with plenty of body. It can be worked in a single color for a classic look, or you can change colors between rows to make the texture stand out even more.
Before starting a large project, I recommend making a small swatch first. This gives you a chance to get comfortable with the stitch and find a tension that feels natural.
Stitches You’ll Need
You don’t need a long list of complicated stitches for this pattern. The basics are enough.
- Chain (ch): Used to create the foundation and turning chains.
- Slip stitch (sl st): A short stitch commonly used for joining or moving across your work.
You’ll also need to be comfortable with yarn overs and pulling loops through stitches.
A Quick Note About Your Hook
Your yarn label will usually suggest a hook size, which is a good place to start. However, don’t be afraid to change your hook size if your stitches feel too tight or too loose.
For the Bean Stitch, consistent tension is particularly helpful because the stitch is made by pulling up several loops. If your tension changes from one stitch to the next, the finished texture may look uneven.
How to Crochet the Bean Stitch
Once you have your yarn and hook ready, let’s make the stitch.
Step 1: Make the Foundation Chain
Start with an odd number of chains, plus 2 additional chains for the turning chain.
For a practice swatch, you can chain 31.
Step 2: Begin the Bean Stitch
Insert your hook into the indicated stitch or space.
Yarn over and pull up a loop. Don’t pull it too tightly—allow the loop to come up slightly higher than you normally would.
Yarn over again, insert your hook into the same stitch or space, and pull up another loop.
Repeat this process once more. You should now have several loops on your hook.
Once you have 6 loops on your hook, yarn over and pull through all 6 loops at once.
Finish the Bean Stitch by chaining 1.
That chain helps close and secure the stitch.
Don’t worry if the first few stitches feel awkward. The Bean Stitch takes a little practice because you’re deliberately pulling up longer loops than you normally would in crochet.
Bean Stitch Pattern
Now that you’ve made the stitch on its own, let’s put everything together into a simple repeating pattern.
Foundation Chain
Chain an odd number of stitches plus 2.
For a practice swatch:
Chain 31.
Row 1
Insert your hook into the 3rd chain from the hook and work a Bean Stitch.
Skip the next chain.
Work another Bean Stitch into the following chain.
Continue across the row, alternating between skipping one chain and making a Bean Stitch in the next chain.
When you reach the end of the row, chain 2 and turn.
Row 2
This is the part that can be a little tricky the first time.
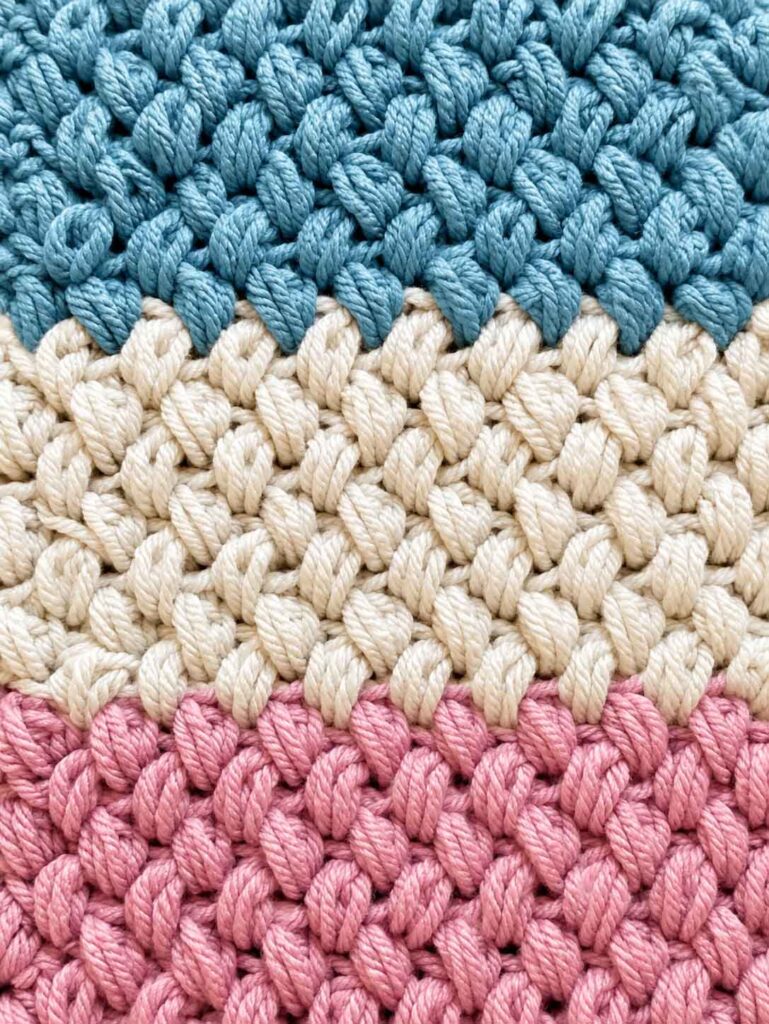
Look at the Bean Stitch you just made. On the left side of the stitch, you’ll notice a small triangle-shaped space.
Insert your hook into this space.
Pull up a loop and complete a Bean Stitch.
Continue across the row, working one Bean Stitch into the space between each pair of Bean Stitches from the previous row.
As you work, take your time finding those spaces. They can be difficult to spot when you’re new to the stitch, especially if you’re using a dark yarn.
Near the end of the row, skip the last Bean Stitch and work a Bean Stitch into the space between the final Bean Stitch and the chain-2 turning chain.
Chain 2 and turn.
Continue the Pattern
Repeat Row 2 until your crochet piece reaches the length you want.
That’s really all there is to it. Once you’ve completed a few rows, the placement of the Bean Stitches becomes much easier to recognize.
Tips for Getting a Neat Bean Stitch
Keep Your Tension Consistent
This is probably the most important tip when working this stitch.
Because you’re pulling up several loops, it’s easy to accidentally make some loops much taller than others. Try to keep them approximately the same height throughout the row.
If you pull the loops too tightly, your Bean Stitches may look small and compressed. If you make the loops extremely loose, the finished fabric can look uneven.
Aim for relaxed, consistent loops.
Take Your Time Finding the Spaces
The triangle-shaped space on the side of the Bean Stitch can be easy to miss at first.
If you’re struggling to see it, gently stretch the fabric with your fingers. The stitches will open up slightly, making the correct space much easier to identify.
After a few rows, you’ll probably be able to find the spaces without thinking about it.
Make a Swatch First
If this is your first time trying the Bean Stitch, don’t jump straight into a large blanket.
Make a small swatch first.
It’s a simple way to practice the stitch, check your tension, and see how your chosen yarn behaves. It’s also much easier to unravel a small swatch than several rows of a blanket!
Experiment With Yarn Colors
One of the fun things about textured stitches is seeing how different colors change the finished look.
A solid color gives the Bean Stitch a soft, classic appearance, while contrasting colors can make each row of texture much more noticeable.
Try soft neutrals for a subtle blanket, bright colors for a cheerful baby project, or alternating shades for a striped design.
Projects You Can Make With the Bean Stitch
The Bean Stitch is surprisingly versatile.
Because it creates a dense and textured fabric, it’s particularly nice for projects where you want something warm and substantial.
Here are a few ideas to try:
- Cozy blankets and afghans
- Baby blankets
- Scarves
- Cowls
- Hats
- Dishcloths
- Pillow covers
- Bags and pouches
- Crochet accessories
For blankets, I love the way the raised stitches give the surface a slightly quilted appearance. For smaller projects, the texture adds interest without requiring a complicated stitch pattern.
Final Thoughts
The Bean Stitch is one of those crochet stitches that may seem a little unusual when you first learn it, but it quickly becomes much easier with practice.
The secret is simply getting comfortable with pulling up those loops and keeping your tension even. Once you’ve worked a few rows, you’ll start to recognize exactly where your hook needs to go, and the pattern becomes pleasantly repetitive.
If you’re looking for a way to add extra texture to a simple crochet project, give the Bean Stitch a try. Experiment with different yarn weights, hook sizes, and color combinations, and see which combination you like best.
Most importantly, don’t worry if your first few stitches aren’t perfect. That’s part of learning. Grab your yarn, make a small swatch, and enjoy the process.
Happy crocheting! 🧶

