

 soofha
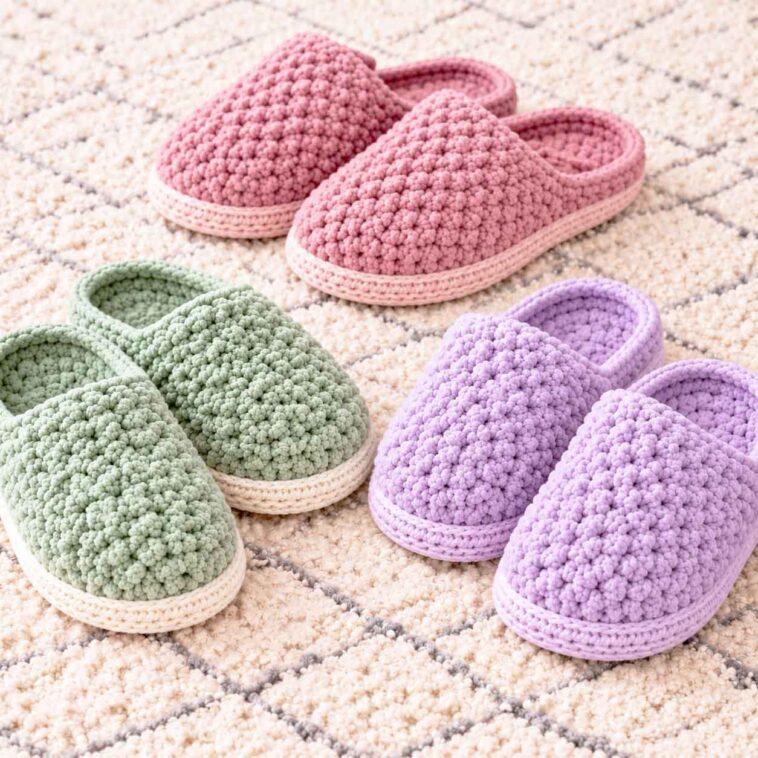
There’s nothing quite like slipping into a comfortable pair of slippers at the end of a long day. Even better when they’re handmade! If you enjoy crochet projects that are both practical and fun to make, these chunky crochet slippers are a lovely addition to your project list.
Welcome to Soofha! Today, we’re taking a closer look at a pair of crocheted slippers made with thick yarn, simple stitches, and a clever double sole for extra support. They have a classic, cozy look that works beautifully for relaxing at home, and they can also make a thoughtful handmade gift for someone special.
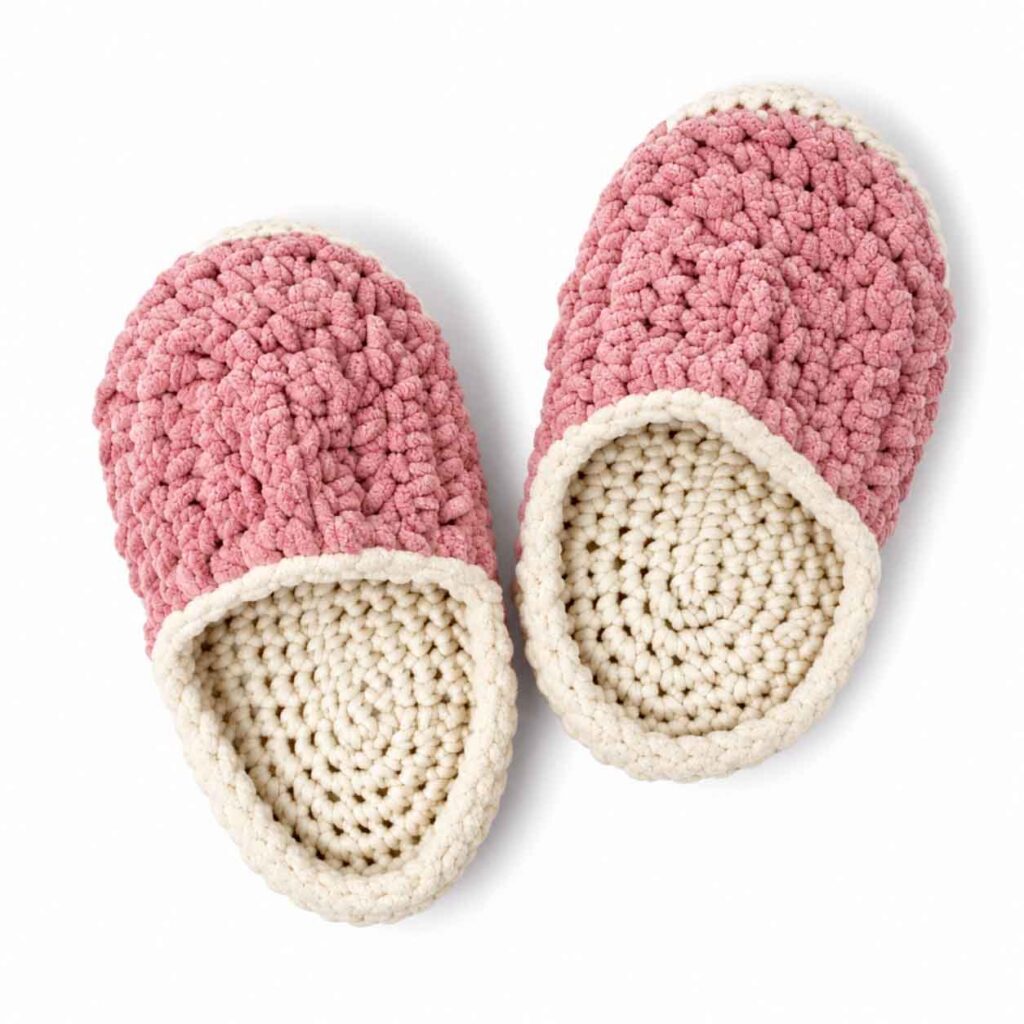
One thing I particularly like about this style is the combination of a sturdy base and a softer upper. The sole gives the slipper its shape, while the top is worked in rows and gradually decreased to create a rounded toe. The construction might look a little different from a basic crochet project, but the individual techniques are familiar to anyone who has practiced single crochet.
This tutorial walks you through the main stages, from making the oval soles to shaping the upper and finishing the opening. Before getting started, keep in mind that the instructions below describe the construction method rather than a fully stitch-counted pattern. You may need to refer to the original PDF tutorial for exact stitch counts and placement.
What You’ll Need
Gather your supplies before you begin. Having everything within reach makes the project easier to follow, especially when you’re working with thick yarn.
- Yarn: Super bulky yarn in two colors or types. Choose a stronger yarn for the sole and a softer yarn for the upper.
- Crochet hook: US size L/11 (8 mm).
- Stitch markers: Helpful for keeping track of the ends of the oval and the shaping points.
- Yarn needle: For sewing the pieces together and weaving in loose ends.
- Plastic canvas: Used between the two sole layers to add structure.
Finished size: Approximately 9½ inches long, based on the original description. The finished fit will depend on your yarn, tension, and gauge.
Crochet Abbreviations (US Terms)
The pattern uses the following abbreviations:
- ch: Chain
- sc: Single crochet
- hdc: Half double crochet
- sl st: Slip stitch
- sc2tog: Single crochet two stitches together
- sc3tog: Single crochet three stitches together
If you’re new to decreases, don’t worry. Both sc2tog and sc3tog combine stitches to reduce the width of the fabric. This is what helps the upper curve over the toes instead of remaining flat.
How These Crochet Slippers Are Made
Before picking up your hook, it helps to understand the construction.
Each slipper is made in three main stages. First, you crochet two matching oval soles. Next, you place a piece of plastic canvas between them and join the layers. Finally, you work the upper over part of the sole, shaping the toe with decreases and adding an edging around the opening.
The double sole is a useful feature because it gives the finished slipper more body than a single layer of crochet. The plastic canvas also helps the base hold its shape, although it should be covered completely and checked for any sharp edges before use.
Step 1: Crochet the First Sole
The sole begins as a chain that is worked on both sides to form an oval. Instead of turning at the end of each row, you continue around the starting chain, placing additional stitches at the ends to create the curves.
Round 1: Form the Oval
Start with a foundation chain, then work single crochet stitches along one side. When you reach the final chain, work several stitches into it to turn the corner.
Continue along the opposite side of the foundation chain until you return to the beginning.
You should now have an oval rather than a straight strip of crochet. This shape forms the foundation of the slipper, so take a moment to check that the stitches are even and the fabric lies reasonably flat.
For the exact starting chain and number of stitches at each end, follow the original PDF instructions.
Rounds 2–5: Build the Sole
Continue crocheting in rounds without turning your work.
The straight sections of the oval need fewer changes, while the curved ends require increases to help the sole grow evenly. Place stitch markers at the ends if you find it difficult to see where the increases belong.
As you complete each round, the oval should gradually become wider and longer. Try not to add increases randomly; too many can make the sole wavy, while too few can cause the edges to curl upward.
Check the shape every couple of rounds. A little attention here will make joining the second sole much easier later.
Round 6: Add Shape and Texture
The next round introduces half double crochet stitches in the central section, with single crochet stitches worked around the edges as described in the original design.
The change in stitch height creates a slightly different texture and helps define the sole’s shape. Keep your tension consistent so that the fabric remains comfortable and does not become noticeably tighter or looser in one area.
Round 7: Prepare the Edge
Work slip stitches loosely into the front loops, following the original tutorial’s placement.
This round creates a defined edge that can be used when attaching the upper. Slip stitches naturally have less height than single crochet stitches, so avoid pulling them too tightly. A very tight edge can make the slipper difficult to shape or cause the sole to curl.
Fasten off as directed in the source pattern, leaving a useful length of yarn if you plan to sew with it.
Step 2: Make the Second Sole
Crochet a second sole to match the first one as closely as possible.
Try to keep the same stitch count, dimensions, and tension. Lay the two pieces on top of each other to check their size before joining them. If one sole is noticeably larger, it may be worth adjusting it now rather than trying to hide the difference during assembly.
Crochet Slippers Pattern
Add the Plastic Canvas
Place the two crocheted soles together with the plastic canvas between them.
- Use one sole as a guide to mark the shape of the canvas.
- Cut the canvas slightly inside the crocheted outline so that it cannot protrude beyond the edges.
- Check carefully for sharp corners or rough edges.
- Position the canvas between the two layers.
- Align the edges and sew the soles together securely, following the original tutorial.
The plastic canvas should remain completely enclosed. It is intended to provide structure, not to touch the foot or floor directly.
This double-layer construction gives the slipper a firmer base and helps it feel more like a small indoor shoe. However, plastic canvas and ordinary crochet yarn do not automatically make a slipper non-slip. If you plan to wear the slippers on smooth floors, consider an appropriate non-slip sole treatment or a purpose-made grippy sole.
Step 3: Work the Upper
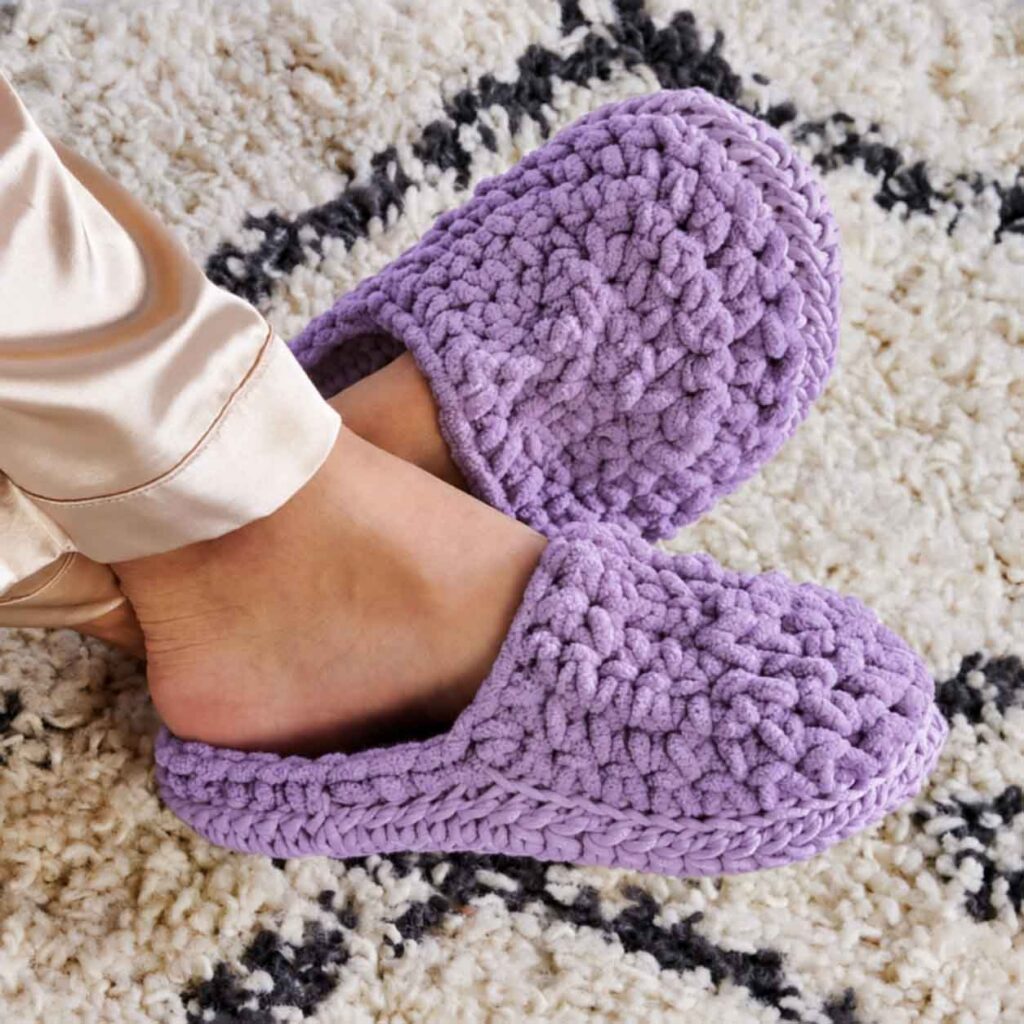
With the sole assembled, it’s time to create the part that covers the top of your foot.
Unlike the oval sole, the upper is worked back and forth in rows. The decreases gradually narrow the fabric toward the toe, producing the rounded shape that gives these slippers their familiar appearance.
Row 1: Attach the Yarn
Join the yarn at the center front of the sole, using the attachment point specified in the original tutorial.
Work across the designated section, skipping stitches where instructed and working single crochet into the appropriate stitches. This establishes the foundation for the upper.
The exact number of stitches worked across the sole is important because it determines how much of the foot the upper will cover. Refer to the source PDF for the precise placement and stitch count.
Row 2: Establish the Base
Chain 1, then work single crochet across the row as directed.
Keep the stitches even and avoid pulling the yarn too tightly at the beginning or end. This row gives you a stable base for the shaping that follows.
Row 3: Start Shaping the Toe
Now the upper begins to narrow.
Work single crochet stitches along the row, placing sc2tog decreases at the positions specified in the pattern. Each decrease combines two stitches into one, reducing the width of the fabric.
Try the upper against the sole as you work, without stretching the crochet. The fabric should begin to curve over the front of the foot rather than lying completely flat.
Row 4: Continue the Decreases
Continue working the upper, following the original placement of the decreases.
Pay attention to both sides so the toe develops evenly. If one side becomes shorter or tighter than the other, check your stitch count and make sure the decreases are positioned correctly.
At this stage, the piece should look increasingly like the top of a slipper.
Row 5: Shape the Front
The next stage uses sc3tog decreases to narrow the fabric further, as indicated in the original design.
Because this decrease combines three stitches, it creates a more pronounced reduction in width. Work carefully and check the shape before moving on to the finishing seam.
Important: The number and placement of decreases for these rows should come from the original PDF. They are not fully specified in the draft above, so the row descriptions alone are not enough to reproduce an exact, correctly sized slipper.
Close the Toe Seam
Fold the upper into position and join the edges using slip stitches, following the source tutorial.
Take your time with this seam. A neat join helps create a rounded front and gives the slipper a more finished appearance. Make sure the seam is secure without pulling it so tightly that it becomes stiff or uncomfortable.
Step 4: Finish the Opening
The final edging tidies up the slipper and helps define the opening.
Join the yarn at the side of the opening and work single crochet evenly around the edge. Depending on the shape and stitch placement, you may need to skip a stitch occasionally to keep the edging from becoming too full.
Check the opening as you go. If the edge flares outward, there may be too many stitches; if it pulls inward sharply, the edging may be too tight or have too few stitches.
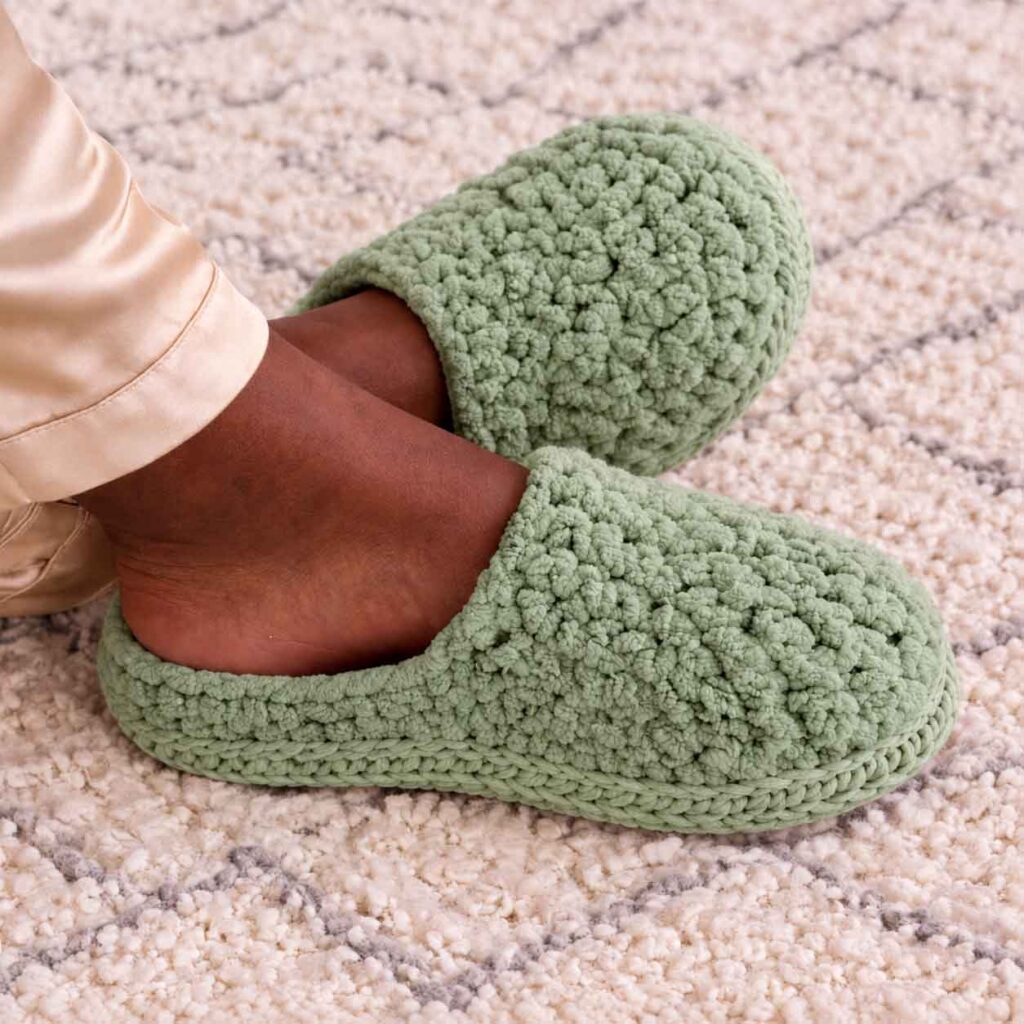
The goal is a comfortable opening that holds its shape without digging into your foot.
Once you finish the edging, fasten off and use your yarn needle to weave in the loose ends securely.
Helpful Tips for a Better Finish
A few small adjustments can make a noticeable difference in the finished slippers.
Use stitch markers. They are particularly useful when working around the ends of the oval sole and when keeping track of shaping rows.
Check your tension. A firm fabric is helpful for the sole, but stitches that are too tight can make the slippers uncomfortable and difficult to assemble.
Count as you go. Keeping track of your stitches makes it easier to spot mistakes before they affect the shape.
Compare the two soles. Matching pieces are easier to sew together and provide a more even base.
Try the slipper on during assembly. Check the fit before closing the toe completely, making sure the upper covers the foot comfortably.
Take care with the plastic canvas. Trim it neatly, cover it fully, and check that no edges can poke through the yarn.
Remember that sizing varies. The stated length of approximately 9½ inches is only a guide. If you need a specific fit, compare the sole with the intended wearer’s foot and consult the original pattern’s sizing information.
A Simple Crochet Project With a Practical Purpose
One of the nicest things about handmade slippers is that they don’t need complicated stitches or elaborate decorations to be special. A chunky yarn, a carefully shaped sole, and a neat upper are enough to create something useful that can be enjoyed every day.
You can also experiment with two coordinating colors, use a contrasting yarn for the sole, or choose a softer shade for a simple, classic look. Just keep in mind that the yarn used for the sole should be suitable for the extra wear that part of the slipper receives.
If you’re making these as a gift, consider the recipient’s preferred colors and the kind of fit they like. Handmade items often become favorites because someone took the time to make something specifically for them.
Frequently Asked Questions
Are these crochet slippers suitable for beginners?
They can be a good project for someone who already knows how to make single crochet stitches and work in the round. The oval sole, decreases, and assembly introduce a few additional techniques, so beginners may find it helpful to work slowly and refer to the original PDF.
Why do the slippers have two soles?
The two crocheted layers enclose a piece of plastic canvas, creating a firmer base than a single layer of crochet. This helps the sole retain its shape and gives the slipper more structure.
Can I use a different yarn?
You can experiment with other yarns, but the finished size and feel will change. A different yarn may require a different hook size or adjustments to the stitch count. Use a durable yarn for the sole and a comfortable yarn for the upper.
How do I make sure the slippers fit?
The stated finished length is approximately 9½ inches, but your gauge will affect the result. Check the sole measurements as you work and compare them with the intended foot size. For a reliable fit, use the original pattern’s measurements and sizing instructions.
Are crocheted slippers suitable for slippery floors?
Not necessarily. Standard crochet soles can slide on smooth surfaces, and plastic canvas does not provide reliable traction. Consider adding a suitable non-slip finish or a purpose-made grippy sole, and check that it is securely attached before wearing the slippers.
Find the Original Chunky Slipper PDF Tutorial
If you’d like to follow the original stitch counts, shaping instructions, and diagrams, refer to the Chunky Slipper Pattern PDF Tutorial.
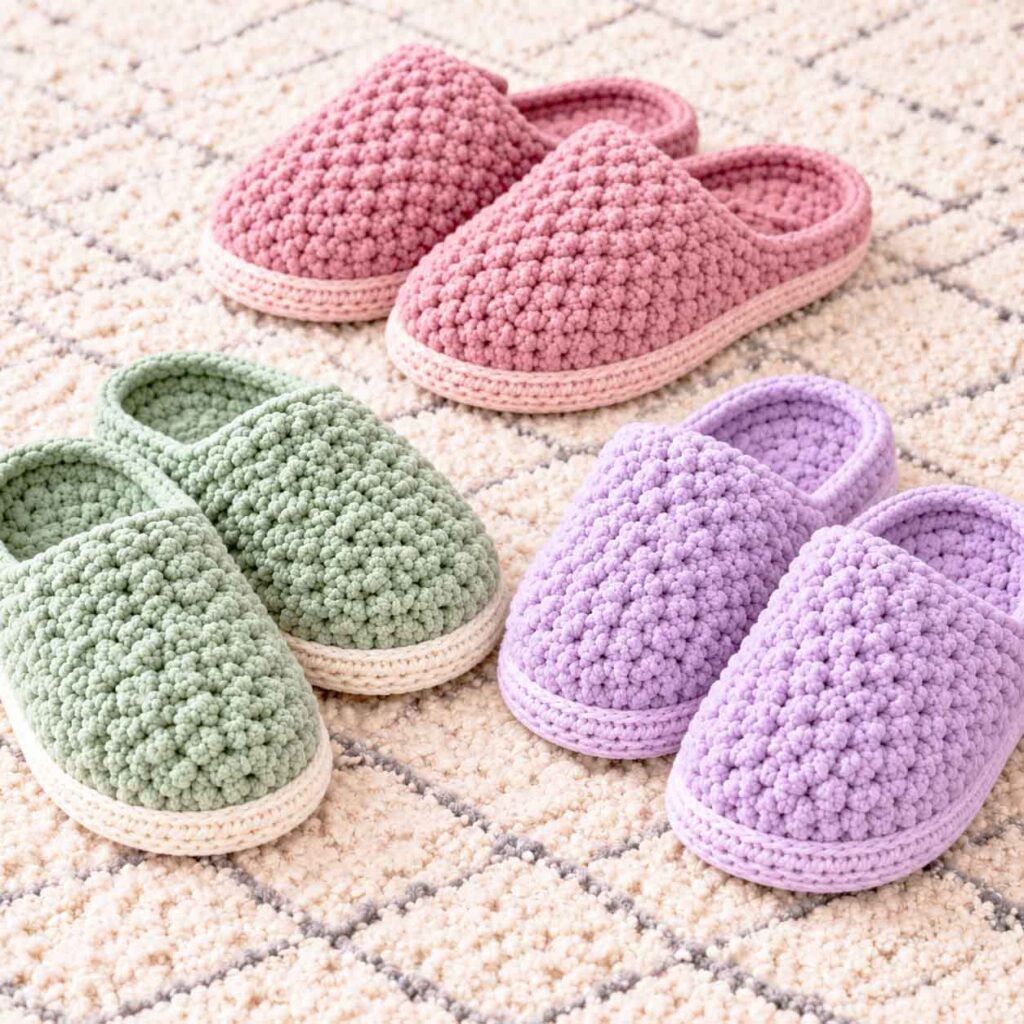
The written guide above explains the construction and the main techniques, while the original PDF is needed for the exact stitch-by-stitch instructions. If you are publishing this article, add the verified source link here so readers can find the tutorial easily.
Thank you for stopping by Soofha and spending a little time with us. I hope this project inspires you to pick up your hook and make something cozy for yourself or someone you love.
And now I’m curious: Would you make these slippers in one color, or would you choose two contrasting shades for a more playful look?

