 soofha
Welcome to Soofha! If you love making Christmas crochet projects that are a little different from the usual winter accessories, this Whimsical Christmas Fringe Crochet Hat is sure to catch your eye. With its bright green ribbing, playful curly fringe, and adorable red bow, it brings a fun holiday twist to a classic crochet beanie.
Some handmade Christmas projects are all about traditional colors and timeless designs, while others are simply made to spread a little joy. This hat falls into the second category. It has a cheerful, slightly mischievous look that makes it perfect for anyone who enjoys adding a bit of personality to their winter wardrobe.
What I love most is the combination of the stretchy ribbed texture and the bouncy curls gathered at the top. From a distance, it looks like an ordinary winter hat, but the little details make it stand out. The red bow adds just the right finishing touch without making the design feel too complicated.
If you’re looking for a festive crochet project to make during the holiday season, this one is a lovely option to consider.
A Fun Christmas Crochet Hat to Make and Wear
This whimsical Christmas hat would be a fun accessory for Christmas morning, holiday parties, family photos, or winter outings. It could also make a thoughtful handmade gift for someone who loves colorful accessories and festive decorations.
The bright green yarn gives the hat its unmistakable holiday look, while the curly fringe creates a playful silhouette. A small red crochet bow completes the design and brings the traditional Christmas colors together.
Despite its unusual appearance, the construction is fairly straightforward. The hat is crocheted flat in rows using half double crochet stitches worked through the back loop. This creates the raised ribs and gives the fabric plenty of stretch.
The rectangle is then joined at the short edges to form the hat, and the crown is gathered underneath the curls. The fringe is worked directly into selected rows, so you don’t have to make lots of separate strands and sew them on afterward.
If you enjoy making handmade Christmas gifts, this is a project that offers something a little different from the usual scarves, mittens, and beanies.
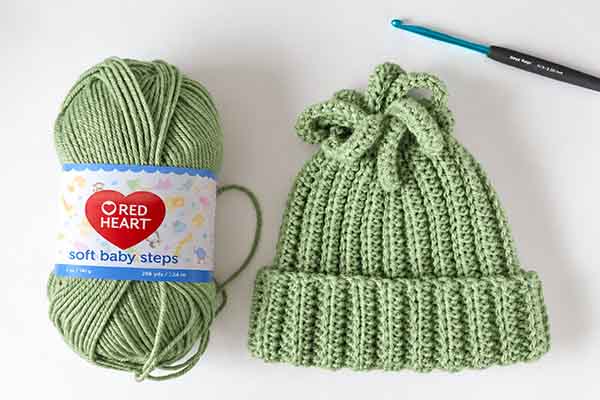
Whimsical Christmas Fringe Crochet Hat Details
- Skill level: Beginner to adventurous beginner
- Project type: Christmas crochet hat
- Construction: Worked flat in rows and seamed
- Texture: Ribbed fabric with curly fringe
- Main colors: Green and red
- Crochet terminology: US terms
Materials
Before starting your Christmas crochet hat, gather the following supplies:
- Green worsted-weight yarn (#4): approximately 200–230 yards
- Red worsted-weight yarn (#4): approximately 20–30 yards
- 5 mm crochet hook
- Tapestry needle
- Scissors
- Stitch marker (optional)
A soft worsted-weight yarn with good stretch and recovery is a great choice for the ribbed fabric. You can use your favorite brand as long as you check your gauge and adjust the fit if needed.
Finished Size
The sample is designed to fit an average adult head.
- Circumference: Approximately 19–20 inches unstretched
- Height: Approximately 9½–10 inches, excluding the fringe
Because the ribbed fabric stretches, the finished circumference should be slightly smaller than the wearer’s head measurement for a comfortable fit.
Gauge
The approximate gauge is:
- 14 half double crochet stitches = 4 inches
- 10–11 rows = 4 inches
Your gauge may vary depending on your yarn and tension. Checking it before starting can help you achieve a similar finished size.
Crochet Abbreviations
This pattern uses US crochet terminology.
- ch: Chain
- sc: Single crochet
- hdc: Half double crochet
- sl st: Slip stitch
- BLO: Back loop only
- st(s): Stitch(es)
Pattern Notes
The hat is worked from side to side in rows rather than in rounds.
The starting chain determines the height of the hat, while the total number of rows determines the circumference. Half double crochet stitches worked through the back loop create the stretchy ribbing.
The first and last four stitches of selected rows are worked as slip stitches. This helps create a firmer edge near the crown.
The curly fringe is added directly to the crown edge during selected rows. You can adjust the length of the curls by changing the number of chains, or make the fringe fuller by adding curls more frequently.
Free Christmas Crochet Hat Pattern
Hat Base
Using green yarn, chain 38.
Row 1: Hdc in the third chain from the hook and in each remaining chain across. You should have 36 stitches. Ch 1 and turn.
Row 2: Working in BLO, sl st in the first 4 stitches. Hdc in BLO in each remaining stitch across. Ch 1 and turn.
Row 3: Hdc in BLO until 4 stitches remain. Sl st in BLO in the final 4 stitches.
You are now at the crown edge.
Ch 16. Working back down the chain, place 2 sc in each chain. The extra stitches will make the chain curl naturally.
When you reach the base of the curl, ch 1 and turn.
Continue the Ribbing
Row 4: Sl st in BLO in the first 4 stitches. Hdc in BLO across the remaining stitches. Ch 1 and turn.
Row 5: Hdc in BLO until 4 stitches remain. Sl st in BLO in the final 4 stitches. Do not add a fringe curl on this row. Ch 1 and turn.
Row 6: Sl st in BLO in the first 4 stitches. Hdc in BLO across. Ch 1 and turn.
Row 7: Hdc in BLO until 4 stitches remain. Sl st in BLO in the final 4 stitches.
At the crown edge, ch 16 and work 2 sc in each chain back toward the hat. Ch 1 and turn.
Row 8: Sl st in BLO in the first 4 stitches. Hdc in BLO across. Ch 1 and turn.
Repeat Until the Hat Reaches the Desired Size
Repeat Rows 5–8 until the rectangle measures approximately 19–20 inches across, ending after Row 6 or Row 8.
The finished rectangle should have a row of curls spaced along one long edge.
For a fuller fringe, add a curl whenever you reach the crown edge. For a lighter look, space the curls farther apart, such as every six rows.
Before joining the hat, wrap the rectangle around the intended wearer’s head. The ends should meet with a little stretch. Add or remove rows if necessary to achieve the desired circumference.
Joining the Crochet Hat
Fold the rectangle so the first and last rows meet, with the right sides facing each other.
Using green yarn, slip stitch through both layers to join the edges. Alternatively, sew the seam with a tapestry needle if you prefer.
Fasten off, leaving a long tail of approximately 18–20 inches.
Turn the hat right side out.
Closing the Crown
Thread the long yarn tail onto your tapestry needle.
Working approximately ½ inch below the curly fringe, weave the needle in and out around the entire crown edge. Once you’ve gone all the way around, pull the yarn firmly to gather the opening.
The curls should come together at the top of the hat.
Wrap the yarn around the gathered section several times to secure it, then fasten off and weave in the remaining end.
Use your fingers to arrange the curls until you’re happy with their shape and placement.
Creating the Folded Brim
Fold the lower edge of the hat upward by approximately 2 inches.
The back-loop half double crochet ribbing gives the brim a stretchy texture that should sit comfortably around the head. You can leave the fold as it is or tack it discreetly at the back seam to keep it in place.
Red Crochet Bow
The red bow is a small detail, but it gives this Christmas crochet hat its finished holiday look.
Using red yarn, chain 24.
Row 1: Hdc in the third chain from the hook and in each remaining chain across. Ch 1 and turn.
Rows 2–5: Hdc in BLO across. Ch 1 and turn after each row.
After Row 5, fasten off, leaving a long yarn tail.
Bring the short ends of the rectangle together and sew them securely to form a loop. Position the seam at the center back.
Flatten the loop and pinch the center tightly between your fingers. Wrap the long yarn tail around the middle several times until the bow holds its shape. Secure the yarn at the back.
Attaching the Bow
Position the bow just below the fringe, either at the center front or slightly to one side.
Use the remaining yarn tail to sew through the center of the bow and into the hat several times. Secure it firmly and weave in the remaining end.
Tips for Making the Fringe Extra Curly
One of the best things about this design is how easily you can change the look of the fringe.
- For tighter curls: Work 3 sc into each chain instead of 2.
- For looser curls: Work 2 sc into each chain.
- For a wavy effect: Work 1 hdc into each chain.
- For a fuller fringe: Alternate chain lengths of 14, 16, and 18 to create curls of different lengths.
Try making a test curl before adding the fringe to your hat. Different yarns can produce different results, so this is a useful way to find the look you prefer.
Adjusting the Hat Size
You can adjust the dimensions of this crochet hat by changing the starting chain and the number of rows.
- For a shorter hat, begin with fewer chains.
- For a deeper hat, add more chains.
- For a smaller circumference, work fewer rows.
- For a larger circumference, work additional rows.
Here are some approximate circumference measurements to use as a guide:
- Child: 17–18 inches
- Teen: 18–19 inches
- Adult medium: 19–20 inches
- Adult large: 20–21 inches
These measurements are only general guidelines. Yarn thickness, stitch tension, and the amount of stretch can all affect the final size, so check the fit before seaming.
Christmas Crochet Hat Color Ideas
Green and red are classic Christmas colors, but you can give this whimsical fringe hat a completely different look by changing the yarn.
Cream and burgundy: A soft cream hat with a burgundy bow creates a more traditional winter look.
Pink and white: This sweet combination is perfect for anyone who loves playful colors and whimsical accessories.
Forest green and deep red: Darker shades create a richer, more classic holiday appearance.
Multiple festive colors: Make several hats in different shades for family photos, matching accessories, or handmade Christmas gifts.
You can also experiment with different bow colors to match your holiday outfits or personal style.
Video Tutorial
The video tutorial referenced with this project demonstrates the Daisy Farm Crafts version of this style. Some stitch counts, row sequences, and fringe techniques may differ from the written instructions in this article.
If you’d like to explore another version, look for the original Fun Fringe Grinch-Inspired Hat by Daisy Farm Crafts. Their pattern offers a different take on this playful holiday design.
ACCESS Crochet Fun Fringe Grinch Inspired Hat
Frequently Asked Questions
Is this Christmas crochet hat suitable for beginners?
The pattern uses basic stitches, including single crochet, half double crochet, and slip stitch. Beginners who are comfortable with these stitches may find the project manageable, although shaping the crown and creating the fringe may take a little practice.
What yarn is best for a crochet Christmas hat?
Worsted-weight yarn is recommended for this pattern. Choose a soft yarn that feels comfortable against the skin and has enough stretch and recovery for the ribbed fabric.
How do you crochet curly fringe?
Chain the desired length, then work multiple single crochet stitches into each chain. The extra stitches encourage the chain to curl. Working more stitches into each chain generally produces tighter curls.
Can I make the hat in a different size?
Yes. Change the starting chain to adjust the height and add or remove rows to change the circumference. Always check the fit before joining the edges.
Is this a good handmade Christmas gift?
Absolutely! Its playful design makes it a fun gift for anyone who enjoys festive accessories. It is especially suited to Christmas parties, holiday photos, and winter celebrations.
Final Thoughts
Christmas crochet projects are even more enjoyable when they let you experiment with color, texture, and a little creativity. This Whimsical Christmas Fringe Crochet Hat combines stretchy ribbing, curly green fringe, and a bright red bow to create a festive accessory with plenty of personality.
I especially like that the curls are worked into the hat as you go, so there’s no need to spend extra time attaching lots of separate fringe pieces at the end.
Whether you’re making this hat for a Christmas party, a family photo, or someone who loves a little holiday mischief, it’s a fun project to add to your seasonal crochet list.
Choose your favorite colors, arrange the curls to suit your style, and enjoy making something handmade for the holidays.
Happy crocheting, and Merry Christmas! ❤️💚
Pattern note: The stitch counts and construction instructions should be checked against a test sample before publication. This rewritten article preserves the supplied pattern details, but the pattern has not been independently tested.

