

 soofha
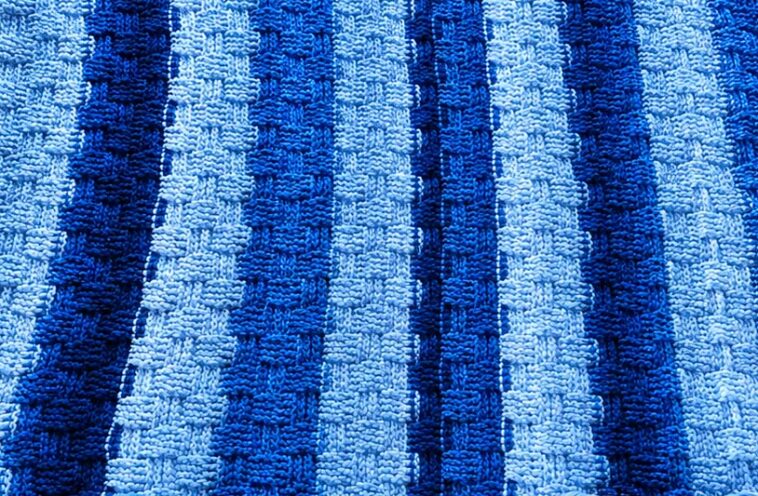
Hello, lovely crocheters! Welcome back to Soofha, your cozy little corner for creative crochet inspiration. Today, we’re excited to share a beautiful textured stitch that has a timeless, woven look—the Basketweave Stitch.
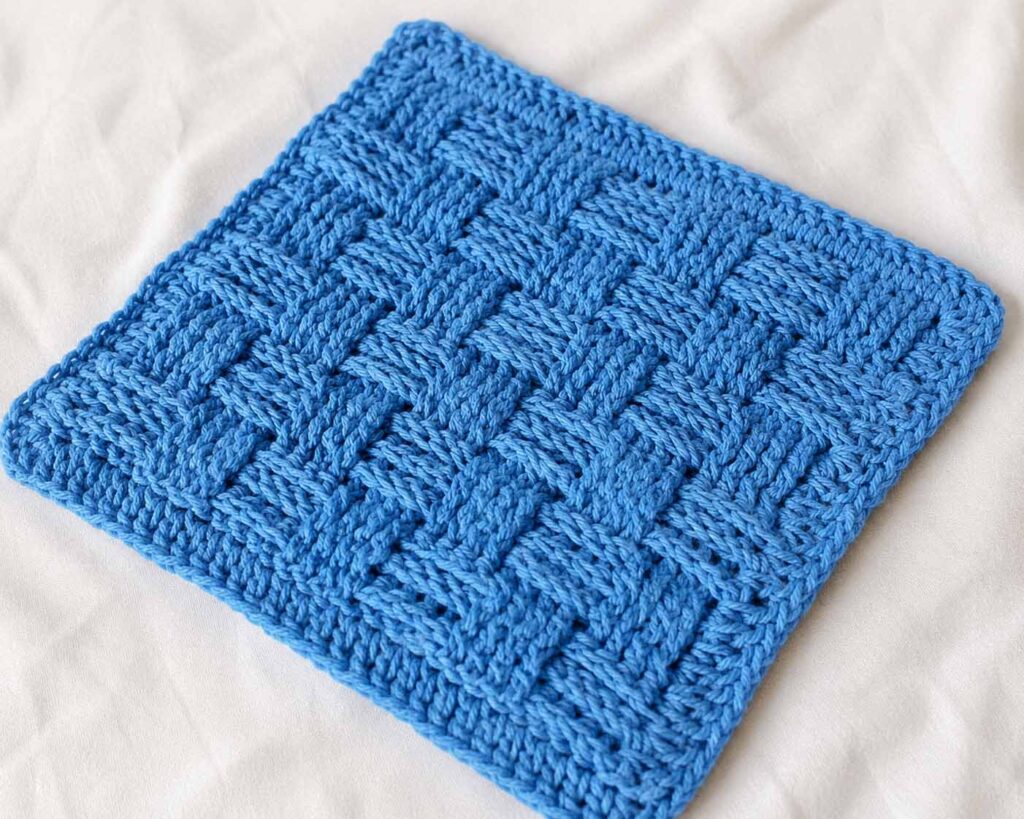
There’s something wonderfully comforting about crochet stitches with plenty of texture. The Basketweave Stitch creates a thick, dimensional fabric that resembles the look of woven strips, making it a beautiful choice for cozy handmade projects. Its classic appearance works especially well for blankets, scarves, pillows, baskets, and other home décor pieces.
This stitch might look complicated when you first see it, but don’t let the texture fool you. Once you understand how to work the front post double crochet (FPDC) and back post double crochet (BPDC), the pattern becomes much easier to follow. The stitches are repeated in organized blocks, creating the raised and recessed sections that give the fabric its signature basket-like appearance.
This written tutorial is inspired by a visual crochet tutorial and has been adapted into an easy-to-follow written format. We’ve organized the instructions step by step so you can follow along comfortably, even if post stitches are still new to you.
One of the nicest things about the Basketweave Stitch is the rhythm. After completing a few rows, you’ll begin to recognize where each stitch belongs, and the repeating pattern can become wonderfully relaxing. It’s the kind of crochet project that lets you settle in, enjoy your yarn, and watch the texture develop row by row.
You can also experiment with different yarn weights and colors. A single shade highlights the beautiful texture, while alternating colors can create an interesting woven effect. Whether you’re making a cozy blanket for yourself or a handmade gift for someone special, this stitch gives you plenty of room to be creative.
Materials
Before getting started, gather the following supplies:
- Yarn of your choice
- Worsted-weight yarn is a good option for beginners
- Crochet hook suitable for your yarn
- A 5–6 mm hook generally works well with worsted-weight yarn
- Scissors
- Yarn needle
Crochet Abbreviations
The pattern uses standard crochet abbreviations:
- ch = chain
- dc = double crochet
- fpdc = front post double crochet
- bpdc = back post double crochet
Understanding the Basketweave Stitch
The Basketweave Stitch is created by alternating groups of front post double crochets and back post double crochets.
A front post double crochet is worked around the post of the stitch from the front of your work, causing the stitch to stand forward.
A back post double crochet is worked around the post from the back, pushing the stitch toward the opposite side.
By changing between these two stitches, you create raised sections that cross visually with recessed sections, producing the characteristic basketweave texture.
If this is your first time working post stitches, take your time. The most important thing is to identify the post of the stitch underneath before inserting your hook.
Basketweave Stitch Pattern
Foundation Chain
Begin by chaining a number that is a multiple of 8 plus 4 chains.
For example:
20, 28, 36, 44, 52, and so on.
Choose a foundation chain long enough for the width of the project you want to make.
Row 1
Make a double crochet in the 4th chain from your hook.
Continue working 1 double crochet into each chain across.
Turn your work.
Row 2
Chain 3. This counts as the first double crochet.
Work 1 dc in each of the next 3 stitches.
Now begin the basketweave texture:
- 4 fpdc
- 4 bpdc
Continue alternating 4 front post double crochets and 4 back post double crochets across the row.
Finish the row with 4 dc.
Turn.
Row 3
Chain 3.
For this row, work the post stitches according to the texture already established:
- Work FPDC over the FPDC stitches from the previous row.
- Work BPDC over the BPDC stitches from the previous row.
Continue following the established stitch pattern across the row.
Turn your work.
Row 4
Chain 3.
Repeat the same post-stitch arrangement as Row 3.
Work each FPDC over the corresponding FPDC and each BPDC over the corresponding BPDC.
Turn.
At this point, you should begin to see the raised blocks of the basketweave pattern becoming more noticeable.
Row 5 — Reverse the Texture
This is where the basketweave sections shift.
Chain 3.
Work 1 dc in each of the next 3 stitches.
Now reverse the post-stitch sequence:
- 4 bpdc
- 4 fpdc
Repeat this sequence across the row.
Finish with 4 dc.
Turn.
Reversing the direction of the post stitches is what helps create the woven, interlocking appearance of the finished fabric.
Rows 6 and 7
Chain 3.
Continue working the stitches as they appear.
Work FPDC over FPDC and BPDC over BPDC, maintaining the texture established in the previous rows.
Repeat for both Rows 6 and 7.
Turn after each row.
Repeat the Pattern
Continue repeating Rows 2–7 until your project reaches the desired length.
As you continue, the textured blocks will become increasingly defined, creating the beautiful woven appearance associated with the Basketweave Stitch.
Remember that crochet tension can affect the final look of the pattern. Try to maintain a consistent tension throughout your project for the most even texture.
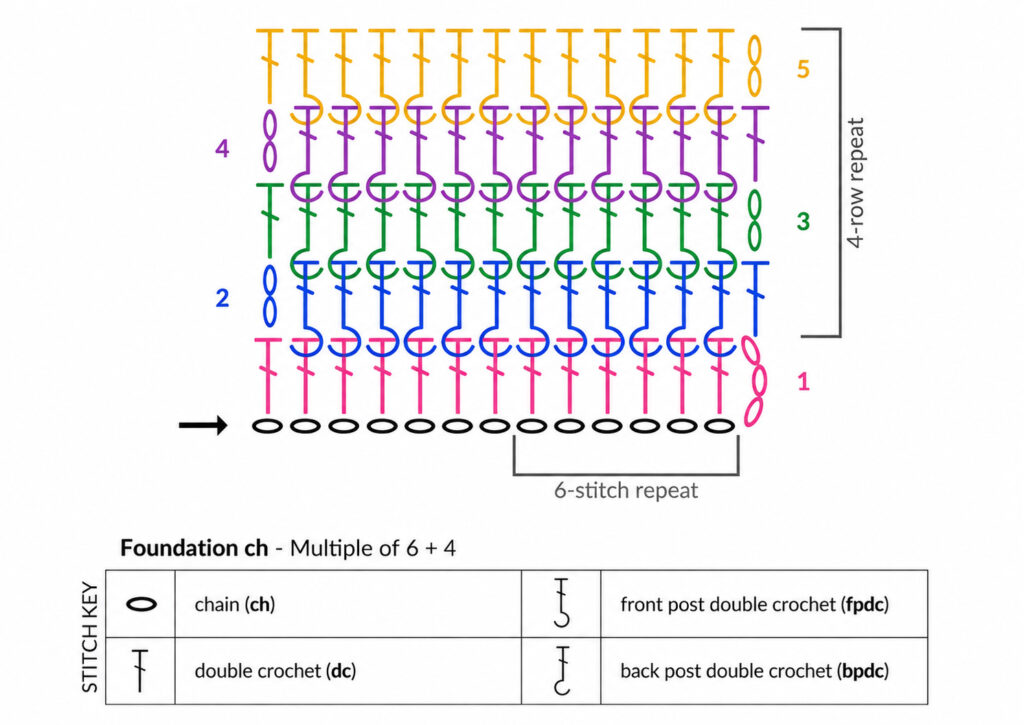
Basketweave Stitch Chart
Use the stitch chart as a visual reference while working through the written instructions.
A chart can be especially helpful when learning to recognize the difference between front post and back post stitches.
Video Tutorial
If you’re more comfortable learning visually, follow along with the video tutorial while practicing the stitch. Watching how the hook moves around the post can make FPDC and BPDC much easier to understand.
Tips for Crocheting the Basketweave Stitch
Keep Your Tension Consistent
Post stitches can sometimes feel tighter than regular double crochets. Try not to pull your yarn too tightly as you work around each post.
Count Your Stitches
Because the stitch pattern is worked in groups, counting your stitches at the end of each row can help prevent mistakes.
Identify the Posts Carefully
When working FPDC and BPDC, make sure you are working around the post of the stitch, rather than into the usual top loops.
Practice With a Small Swatch
If post stitches are new to you, consider making a small sample before beginning a large blanket. This gives you an opportunity to practice the technique and become comfortable with the pattern repeat.
Try Different Colors
The Basketweave Stitch looks beautiful in one color, but it can also be fun to experiment with color changes. Contrasting colors can emphasize the individual woven blocks and give your project a completely different personality.
Project Ideas for the Basketweave Stitch
Once you’re comfortable with the stitch, there are many projects you can create with it.
Consider using the Basketweave Stitch for:
- Cozy blankets
- Baby blankets
- Warm scarves
- Winter cowls
- Decorative pillow covers
- Crochet baskets
- Table runners
- Throws
- Home décor accessories
- Handmade gifts
Because the stitch creates a relatively thick and textured fabric, it’s particularly lovely for projects where warmth and structure are important.
Final Thoughts
The Basketweave Stitch is one of those crochet techniques that looks impressive while relying on a simple repeating rhythm. Once you become familiar with front post and back post double crochet, the pattern becomes much more approachable.
Take your time as you learn the stitch, especially if post stitches are new to you. Don’t worry if your first few rows aren’t perfect. Like any crochet technique, it becomes easier with practice.
There’s something incredibly satisfying about watching those raised stitches gradually transform into a woven texture. Before long, you’ll find yourself naturally recognizing which direction each stitch should go, and the repetitive rhythm can become a wonderfully relaxing part of the crochet process.
We hope you enjoy experimenting with this classic stitch and finding your own creative ways to use it. Choose your favorite yarn, pick up your hook, and let each row bring your project a little closer to completion.
Thank you for spending some creative time with us here at Soofha. We hope this Basketweave Stitch tutorial inspires you to slow down, enjoy the process, and create something beautiful with your own hands.
Happy crocheting, dear friends! 🧶💕

